Browse Integrations & API
- Dashboard overview
- Insights overview
- Sites Overview - Network Deployments
- Policies Overview - Create and Edit
- Custom Lists overview
- Clients Overview - Device Agents and Profiles
- Users Overview - Directory Users and Personas
- Organizations Overview - MSP Tenant Management
- Lookup Tool Overview
- Query Log Overview
- Settings Overview - Account Administration
- Help & Support Overview
- Signing In - Login, 2FA, and Password Reset
- Two-factor authentication (2FA)
- Add system users (role-based access)
- Check domain classification with the Lookup Tool
- Configurable objects and their associations
- Configure notifications
- Working with organizations (multi-tenant)
- Working with policies
- Content categories
- Security categories
- Application categories (Zero Trust app management)
- Working with allow and block lists
- Zero Trust TLD Filters
- Safe Search explained
- Safe Search supported search engines
- YouTube Restricted Mode explained
- Custom block pages
- Prevent DNS bypass
- Don't mix DNS providers
- Active Directory group policies
- Entra ID group policies
- Tracking individual users
SIEM data export
Stream DNS query and event data from ScoutDNS into Splunk, Huntress, or any generic HEC endpoint for analysis, threat correlation, and compliance.
Overview
The SIEM Data Export feature allows administrators to stream DNS query and event data from ScoutDNS directly into their SIEM or log analytics platform for advanced analysis, threat correlation, and compliance reporting.
ScoutDNS currently supports HTTP Event Collector (HEC)-based integrations, including:
- Splunk HEC
- Custom / Generic HEC destinations
- Huntress SIEM
- Sumo Logic
How it works
ScoutDNS continuously streams query log data as JSON payloads over HTTPS to the configured HEC endpoint. Each record includes DNS query details such as timestamps, client information, policy actions, and classifications. This enables direct ingestion into platforms like Splunk Enterprise / Cloud or other SIEM systems supporting HEC-compatible APIs.
Prerequisites
Before configuring export:
- Your plan must include SIEM Export (Network 360 or any MSP plan)
- You must have the Admin or Super Admin role
- Your destination system must expose a reachable HEC endpoint (HTTPS recommended)
- A valid HEC token is required for authentication
[!IMPORTANT] SIEM Export requires the Network 360 plan or any MSP plan. Admin and Super Admin roles can configure exports; other roles cannot.
Configuration options
When creating a new SIEM export stream, administrators can customize how and what data is sent.
Endpoint settings
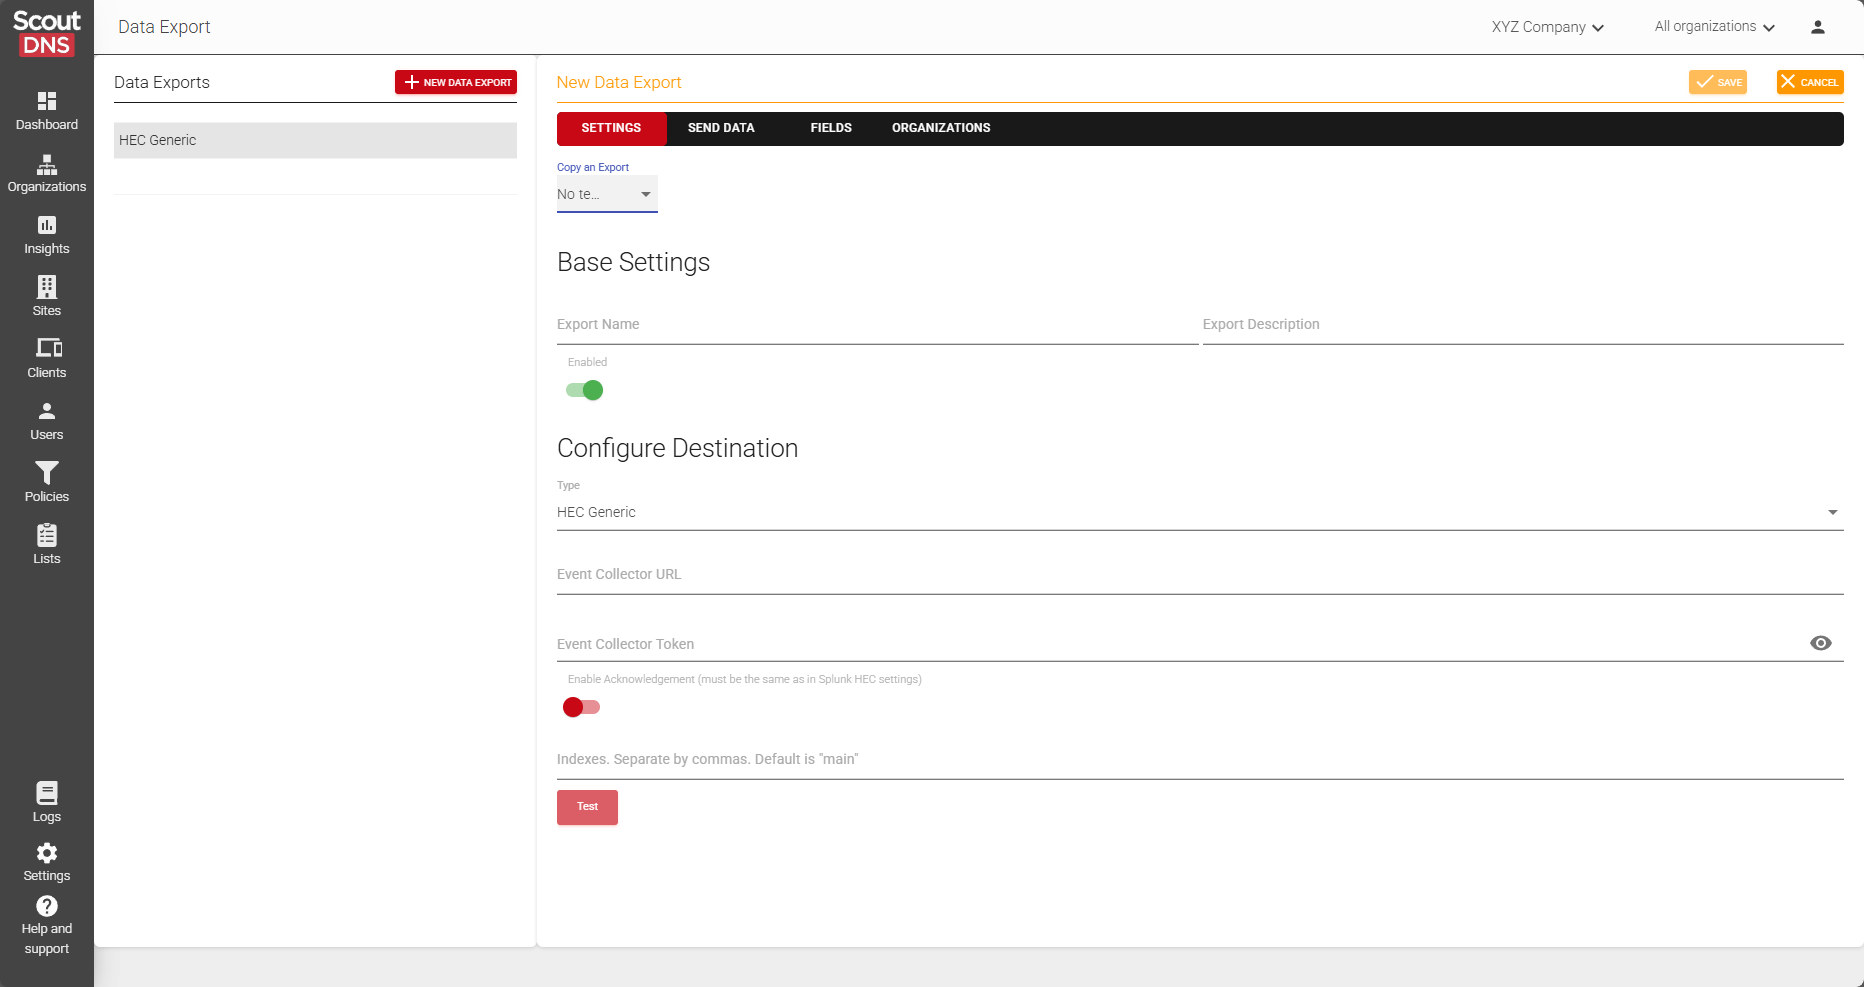
Admins define the destination endpoint for the stream. The Type selector offers:
- HEC Generic, for Splunk HEC and any other HEC-compatible SIEM or log management system
- Huntress, pre-fills the Huntress collector URL
- Sumo Logic HTTP source, for Sumo Logic hosted collectors
Enter the endpoint URL (e.g., https://splunk.company.com:8088/services/collector) and HEC token.
You can use the Test button to ensure the connection is successful.
Data type
Choose the type of data to include in the export on the Send Data tab. Select one or multiple filters per stream:
- All Queries, sends all DNS query logs, including allowed and blocked requests
- Threats Detected, sends only events classified as security threats (e.g., malware, phishing, C2)
- Restricted Content, sends only policy-driven content filtering blocks (e.g., adult content, social media, streaming)
Turning on All Queries includes both of the other filters automatically; at least one filter is always active.
Fields
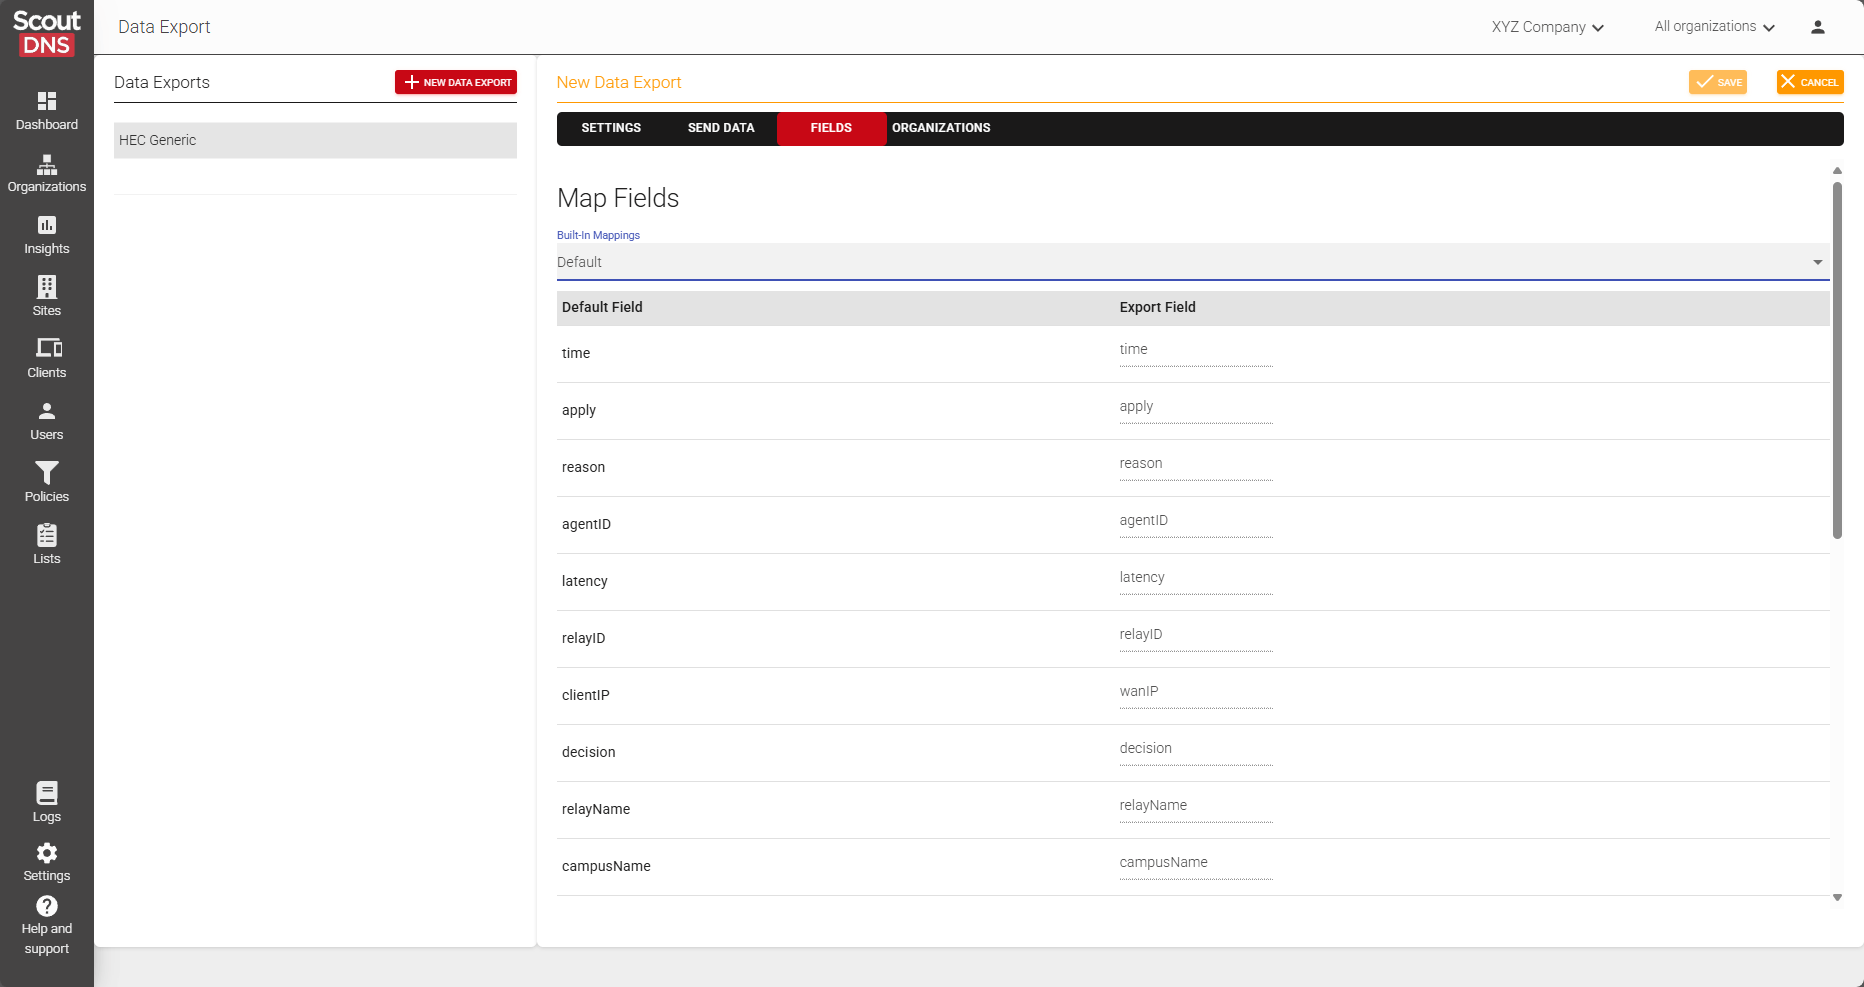
In the Fields tab, we can select data and labels on export.
- Default, Default labels as in logs tab
- ECS, ECS compatible labels
- Custom, Select data and labels. Any label not selected will be dropped on export.
Organization scope (MSP only)
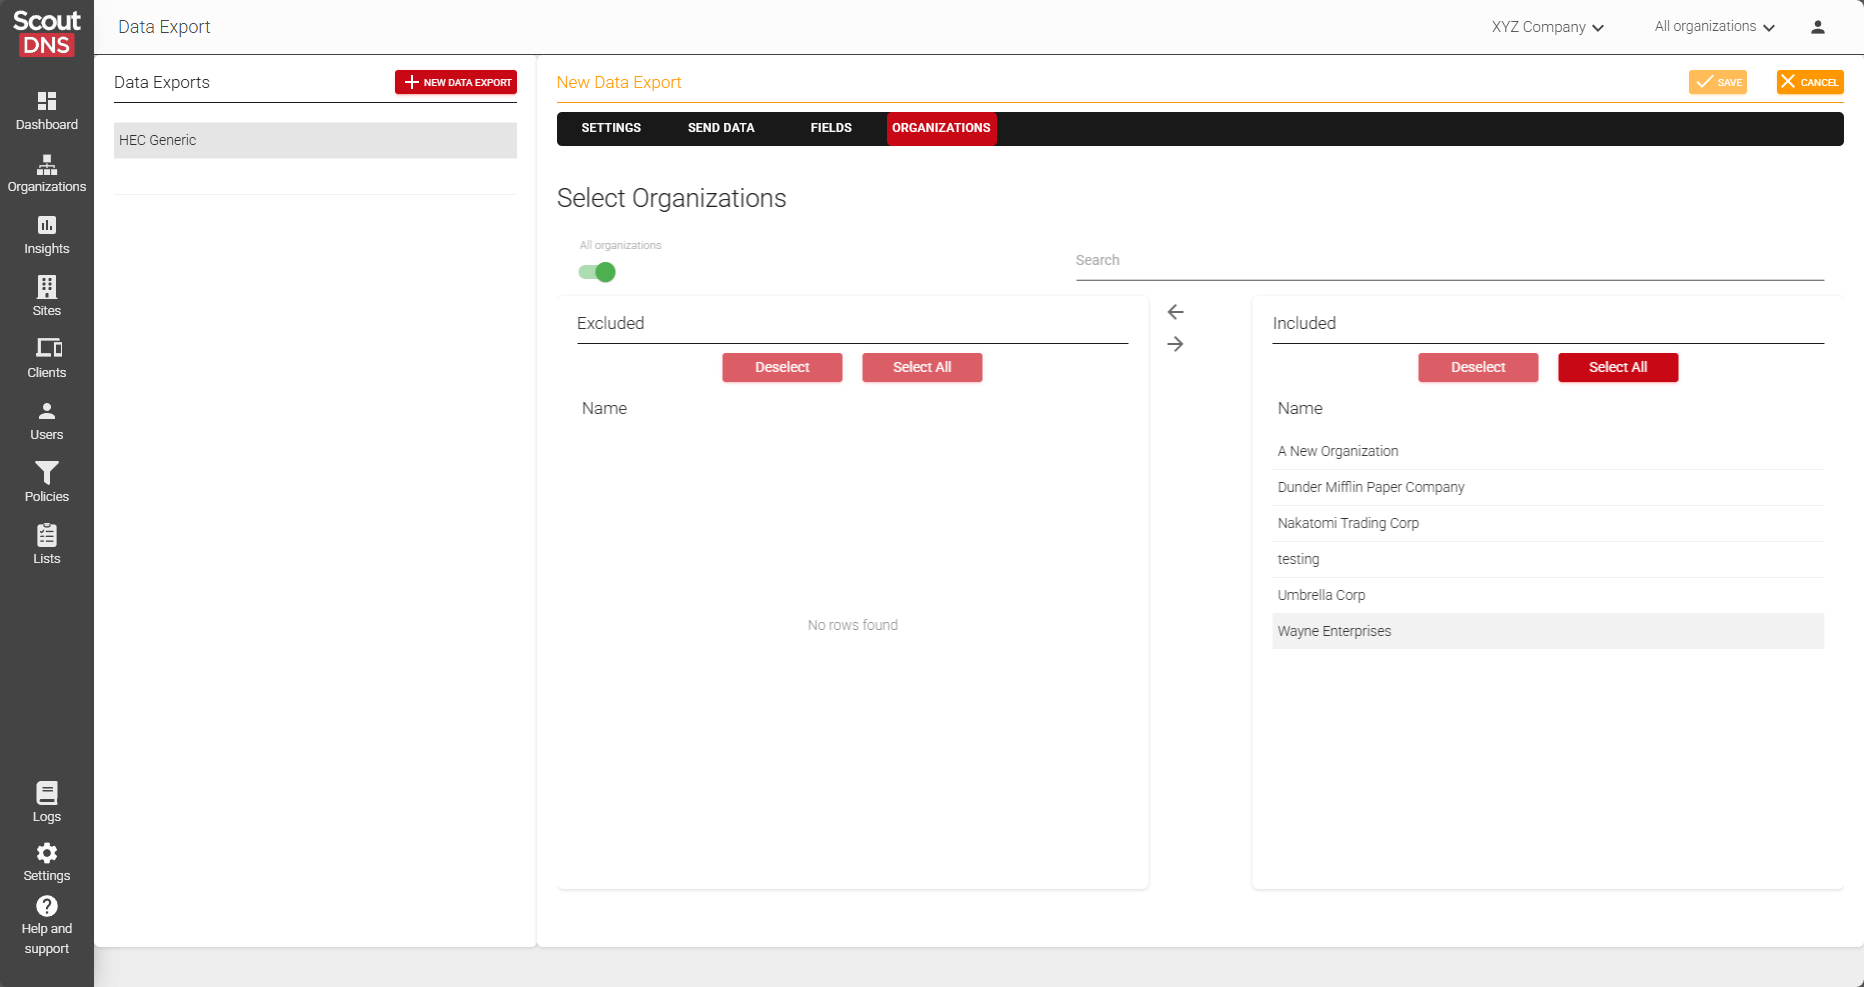
If your account is configured for MSP / Multi-Organization management, you can define export scope. This allows MSPs to maintain separate exports for some clients or combine all into a single SIEM destination.
- All Organizations, sends data for every managed organization
- Specific Organizations, choose one or more organizations to include in the stream
Configure Huntress SIEM export
From your Huntress portal
- In SIEM Source Management select Add Source and choose ScoutDNS as source type.
- Choose the organization to assign data to. It is recommended to choose a single parent org, otherwise you must repeat these steps to create an export for every organization. Organization data is still labeled with all queries.
- Name the source collection and Save to generate your token.
ScoutDNS is an official Huntress SIEM integration. Huntress documents it in SIEM: HEC - ScoutDNS.
[!TIP] Copy the Huntress HEC token immediately, it’s only shown once. Store it somewhere safe (or paste it directly into the ScoutDNS configuration in the next step).
From ScoutDNS
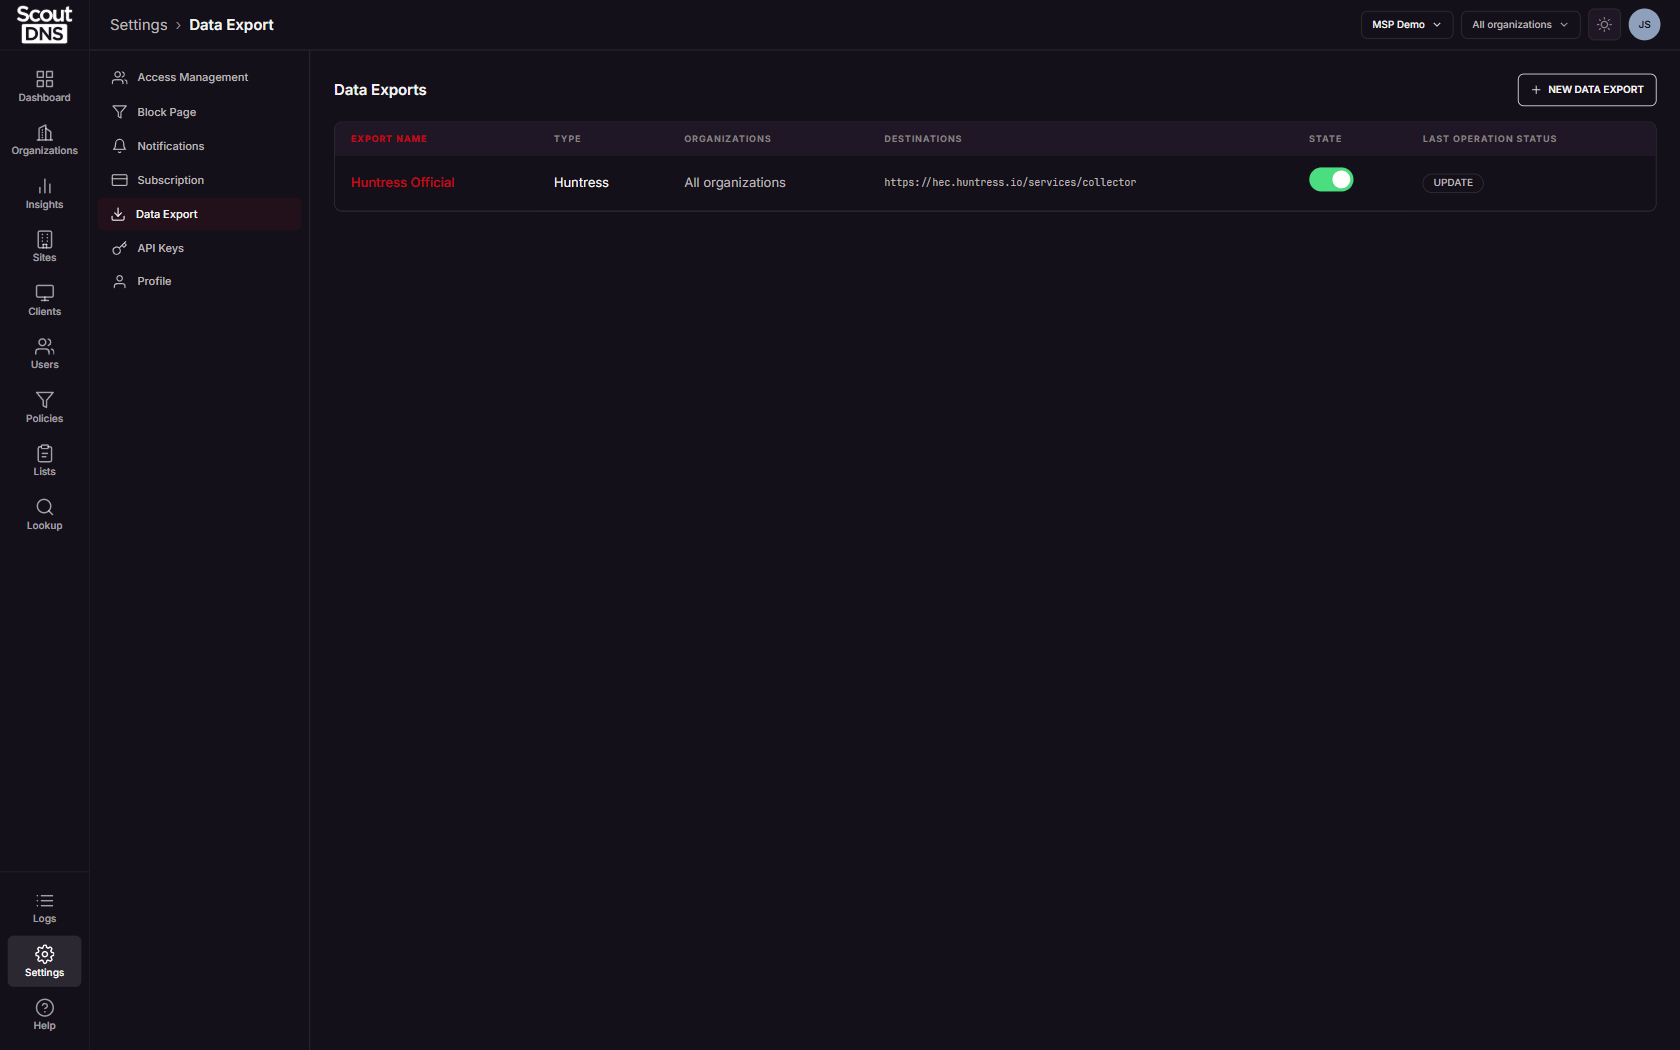
Navigate to Settings → Data Export and choose New Data Export.
Settings tab
- Name your export and enter a description if desired
- Under Configure Destination, select Huntress as Type. This will populate the Event Collector URL automatically.
- From your Huntress portal, copy and paste the token generated earlier.
- You can use the Test button to ensure Token and account connect successfully.
Send Data tab
- It is recommended to send all query types.
Fields tab
- ScoutDNS sets to ECS and this mapping cannot be changed.
Organizations tab
- Select specific organizations or choose All Organizations.
Press Save in the upper right corner and your data export will activate and start streaming right away. Data is sent in near real-time as queries are logged within ScoutDNS.
[!WARNING] Deleting a Data Export configuration stops the stream immediately and cannot be reversed without recreating the export from scratch. If you only need a temporary stop, use the State toggle on the Data Exports list to disable the export instead.
[!TIP] Setting up several similar exports? Copy an Export on the Settings tab pre-fills a new export from an existing one, everything except its name, description, and token.