Browse Policies & Filtering
- Application categories (Zero Trust app management)
- Active Directory group policies
- Content categories
- Custom block pages
- Don't mix DNS providers
- Prevent DNS bypass
- Safe Search explained
- Safe Search supported search engines
- Security categories
- Working with policies
- Working with allow and block lists
- YouTube Restricted Mode explained
Working with policies
Policies are where you define what gets blocked or allowed in ScoutDNS, threat categories, content categories, applications, and per-network or per-device overrides.
A policy is where you configure threat protections and content restrictions. Once created, policies are assigned to control points, WAN/LAN networks, roaming-client device profiles, or Active Directory / Entra ID persona groups, depending on how you want filtering applied.
How policies relate to other objects
- Allow/Block lists are attached to a policy and override category decisions for specific domains.
- Policies carry the actual filter configuration (threats, content categories, applications, Safe Search, ad blocking, etc.).
- Control points, WANs, LANs, device profiles, personas, are what you assign a policy to. The same policy can apply to multiple control points.
Default policies are read-only
ScoutDNS ships a set of default system policies as examples. They are read-only and can’t be edited, they’re meant to demonstrate sensible starting points. To take full control, create your own policies (you can copy from a default to save typing).
Template and global policies
Any policy can be reused across multiple control points. You can also treat a policy as a template, copy it and tweak the copy for a different control point. MSPs commonly use this pattern to customize per-tenant policies from a shared baseline.
Create a policy
- Open the Policy tab and click New Policy in the top right.
- (Optional) Use the Copy a Policy dropdown to seed from a default or existing policy.
- Fill in the four tabs: Settings, Threats, Content, Applications.
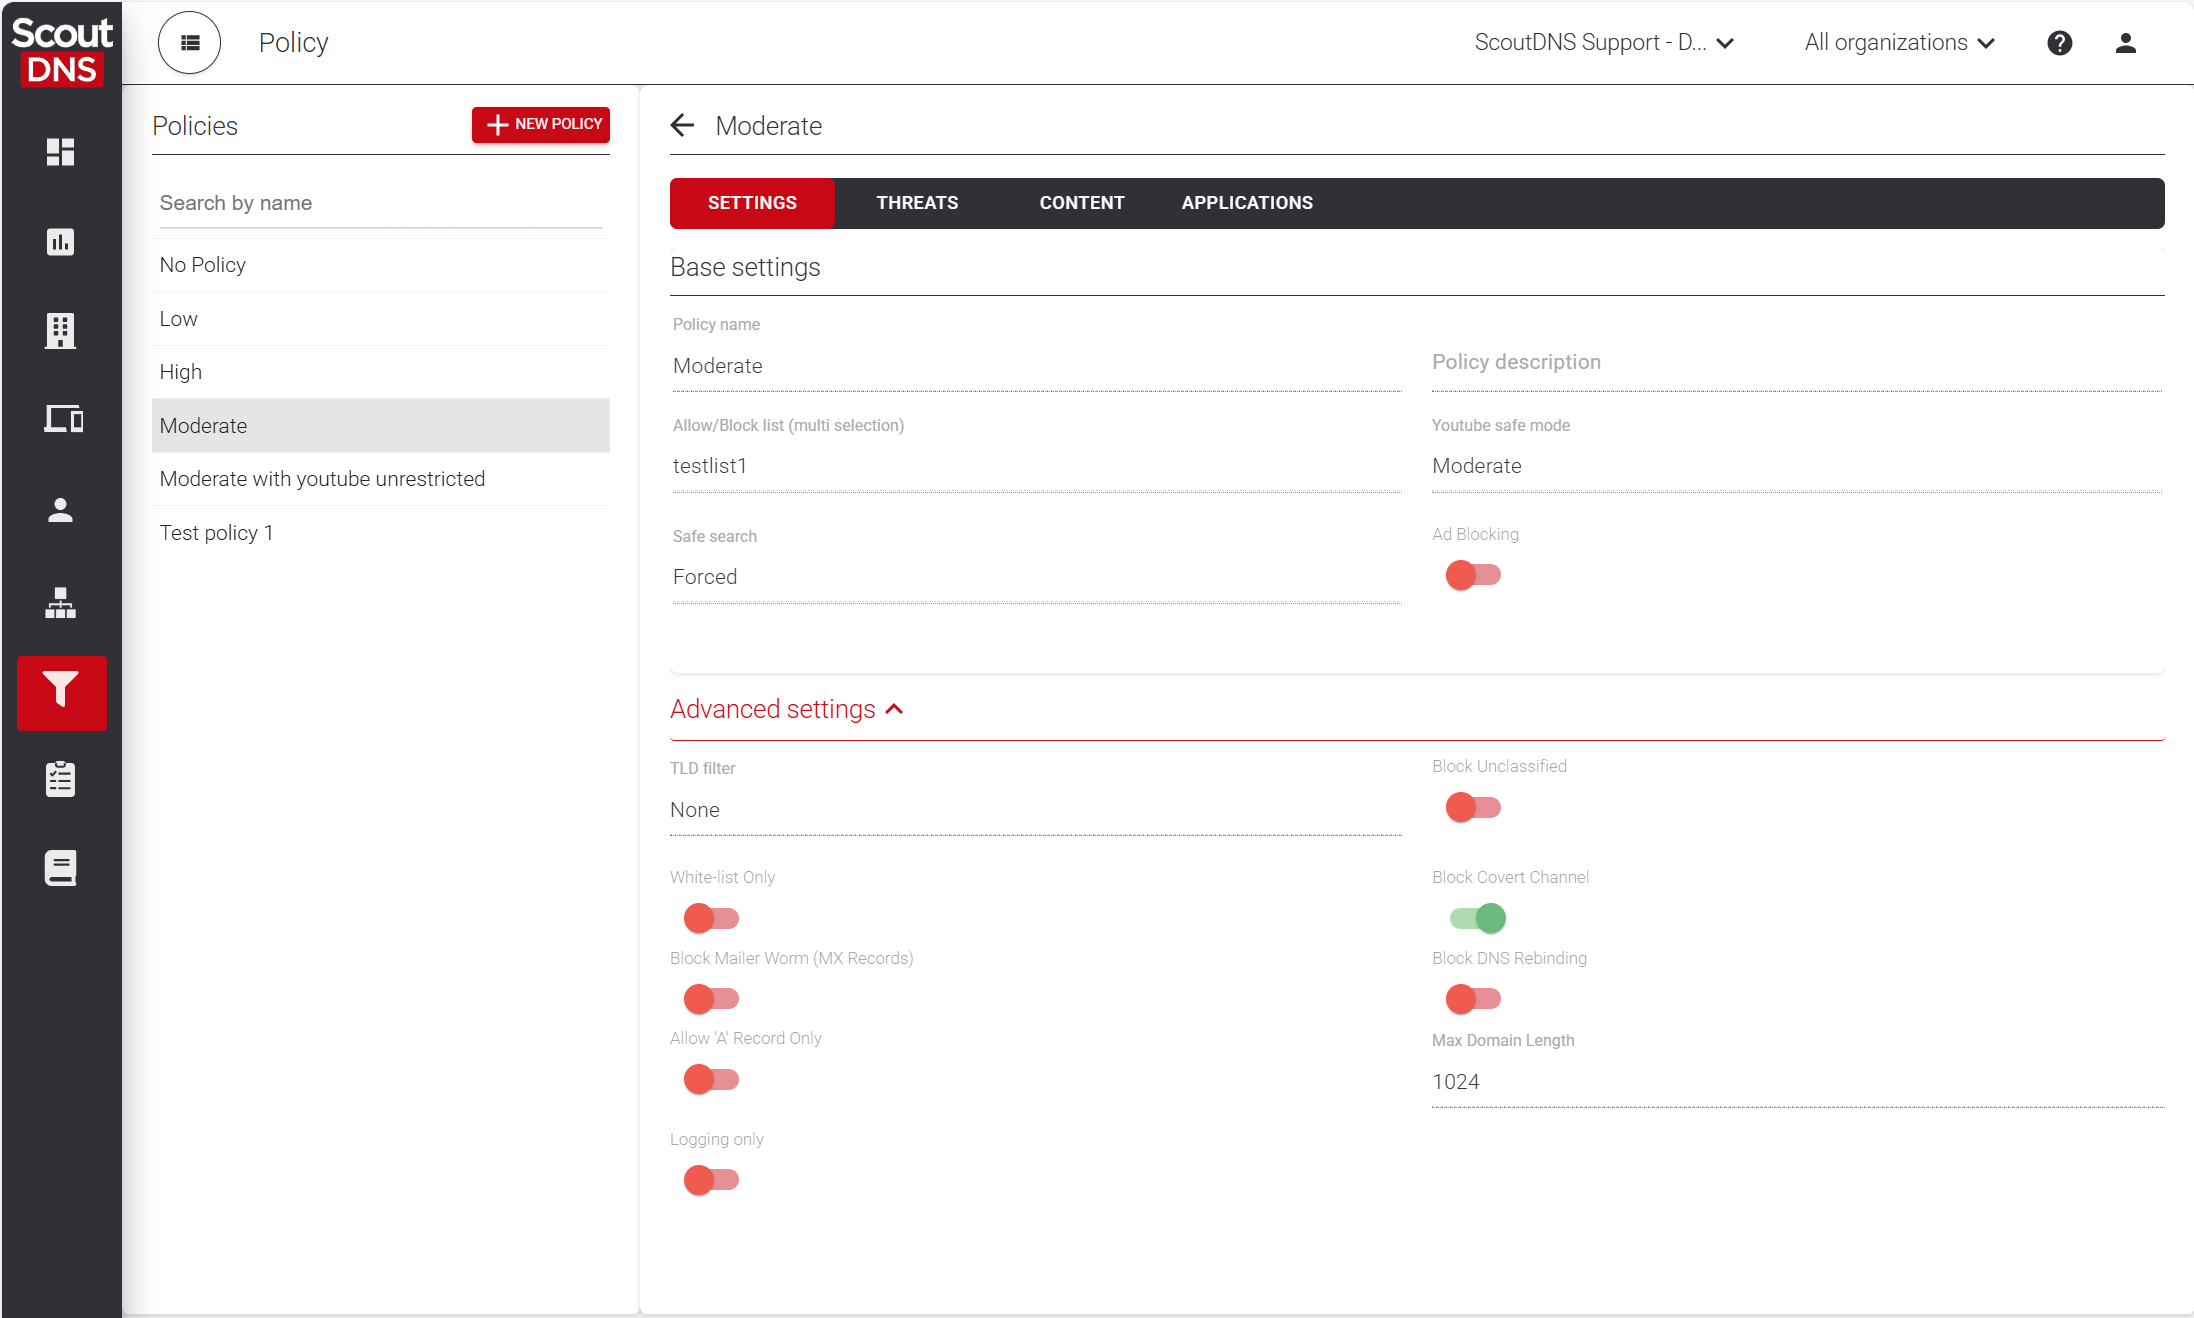
Settings tab
Two groups: Base and Advanced.
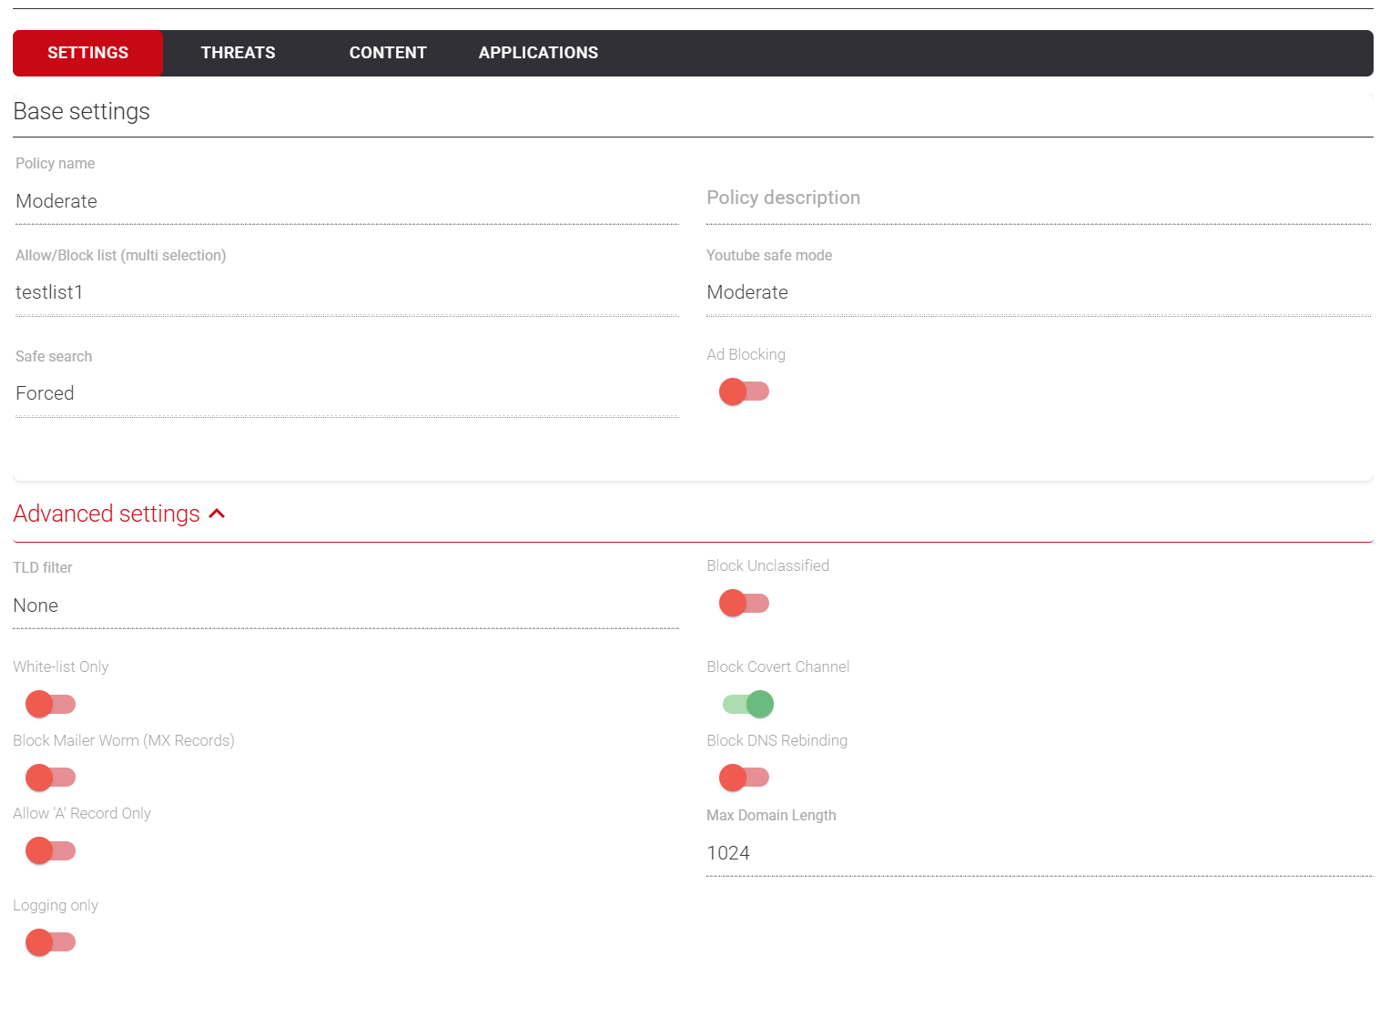
Base settings
| Field | What it does |
|---|---|
| Policy Name | Display name for the policy |
| Policy Description | Free text, useful for explaining the policy’s intent to other admins |
| Allow/Block List | Attach a previously created list to override category decisions for specific domains |
| YouTube Safe Mode | Apply YouTube restrictions. See the YouTube article for what each mode allows |
| Safe Search | Force safe results on Google and Bing. See Safe Search explained for the difference between On and Forced |
| Ad Blocking | Block domains commonly used to serve display ads |
Advanced settings
| Toggle | What it does |
|---|---|
| TLD filter | Apply a previously created TLD allow/block filter |
| Whitelist only | Block everything except domains on the policy’s allow list |
| Logging only | Disable enforcement but still log what would have been blocked, useful for piloting a policy before going live |
| Block Unclassified | Block any domain that doesn’t have a ScoutDNS category. Can block newly registered domains; submit a classification request if a legit domain is being blocked |
| Max Domain Length | Block domains over a configurable character length |
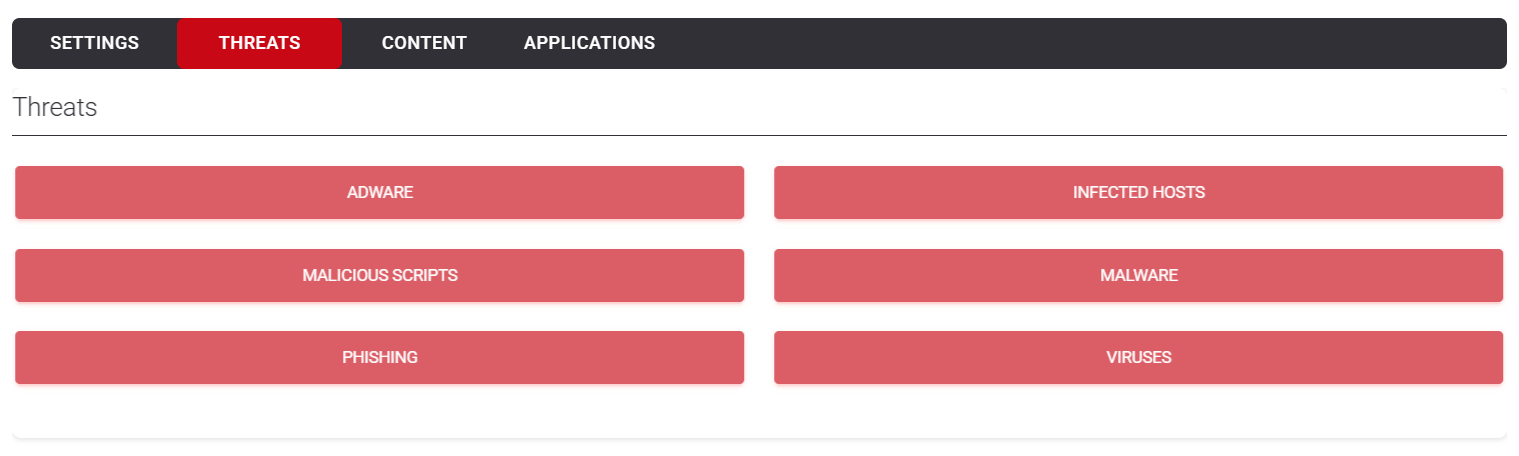
Threats tab
Toggle protection against malware, phishing, command-and-control, and other security threat categories.
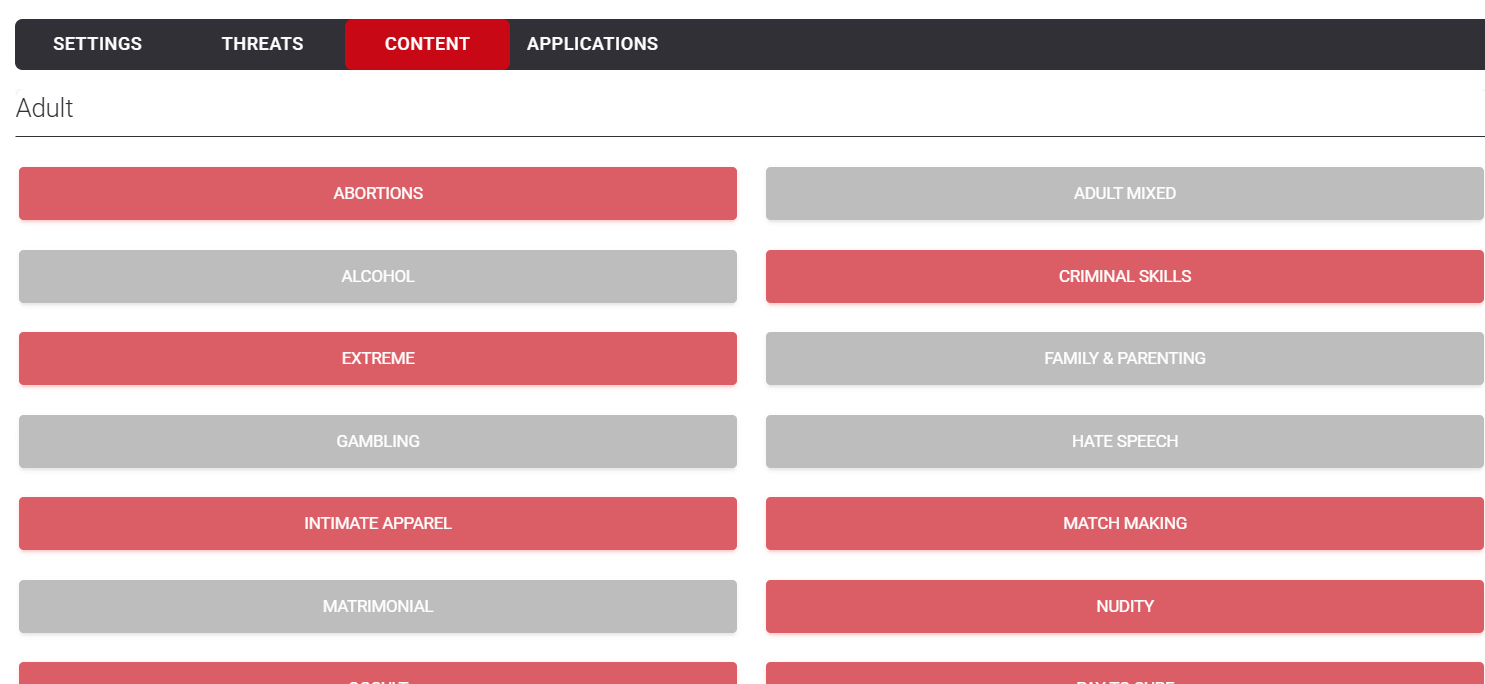
Content tab
Block content categories like Adult, Social Media, Streaming, Gambling, Real Estate, Job Search, and many others. Some domains appear in multiple categories, blocking a category blocks every domain it contains.
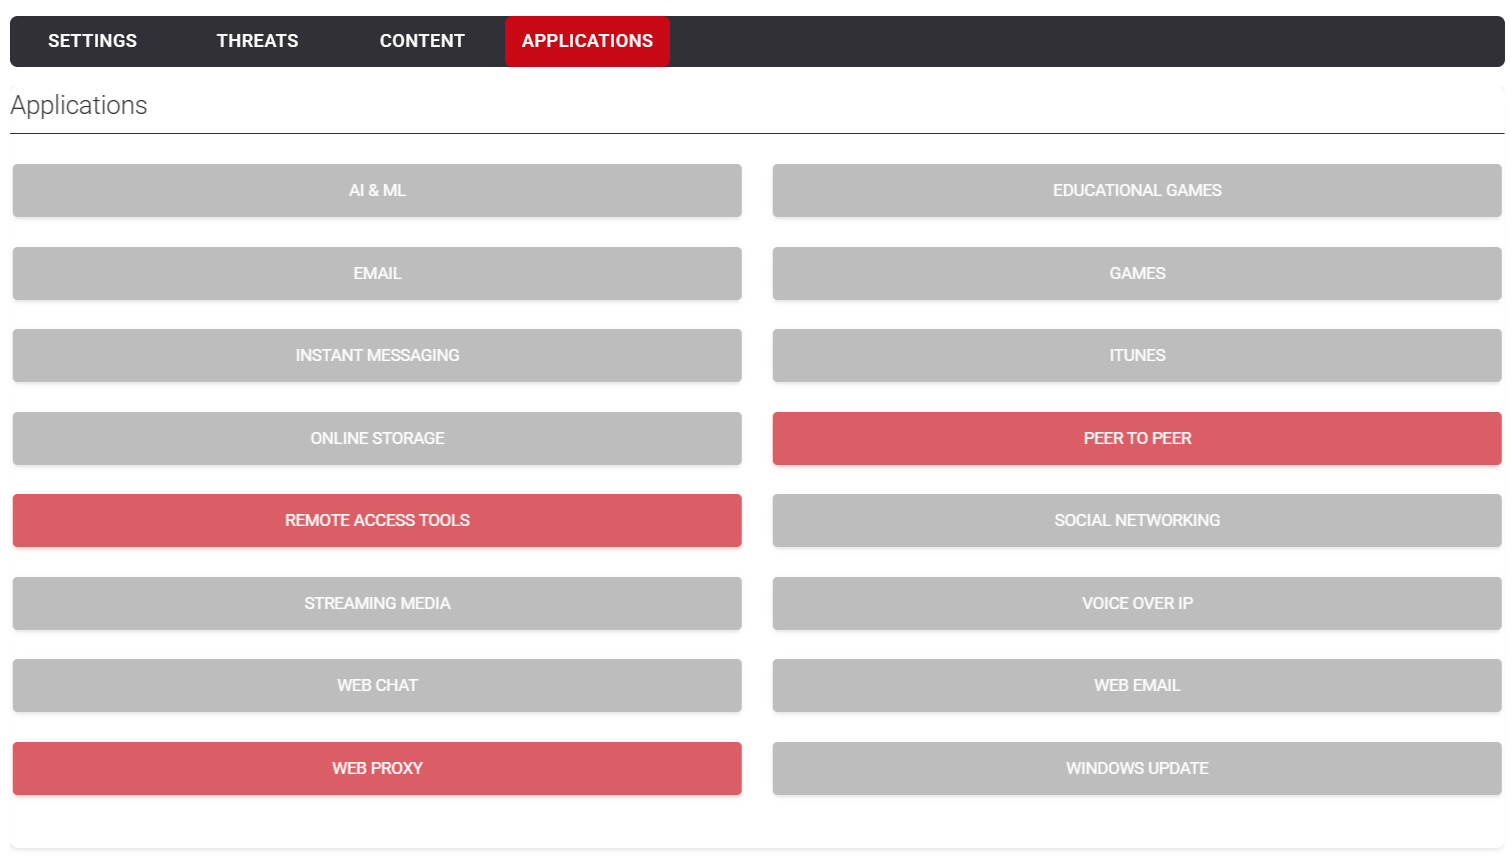
Applications tab
Block specific web applications by name. For example, toggling Social Media here blocks Facebook, Instagram, and similar apps without having to know each underlying domain.
Apply a policy to a control point
A single policy can be applied to networks, device profiles, persona groups, or individual devices. The right one depends on your deployment shape.
[!TIP] Best practice: assign policies to device profiles rather than individual clients. Add all roaming clients to a profile and apply the policy to the profile, every device under that profile inherits the policy automatically.
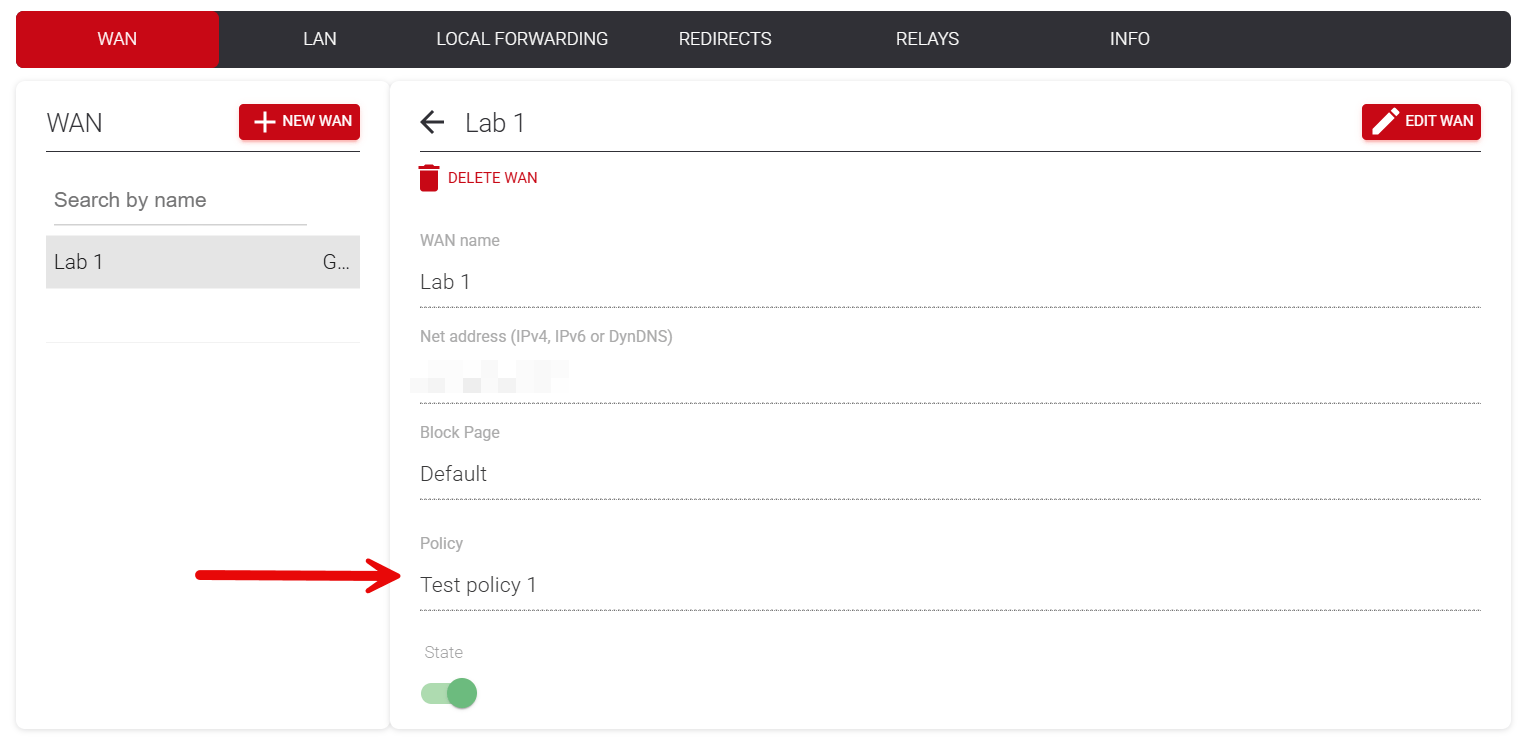
To a WAN or LAN network
- Open the Sites tab → select the site.
- Open the WAN or LAN subtab → click the network you want to apply the policy to.
- Click Edit WAN (or Edit LAN).
- Under Policy, select the policy.
- Save.
LAN policies require a Relay on the network.
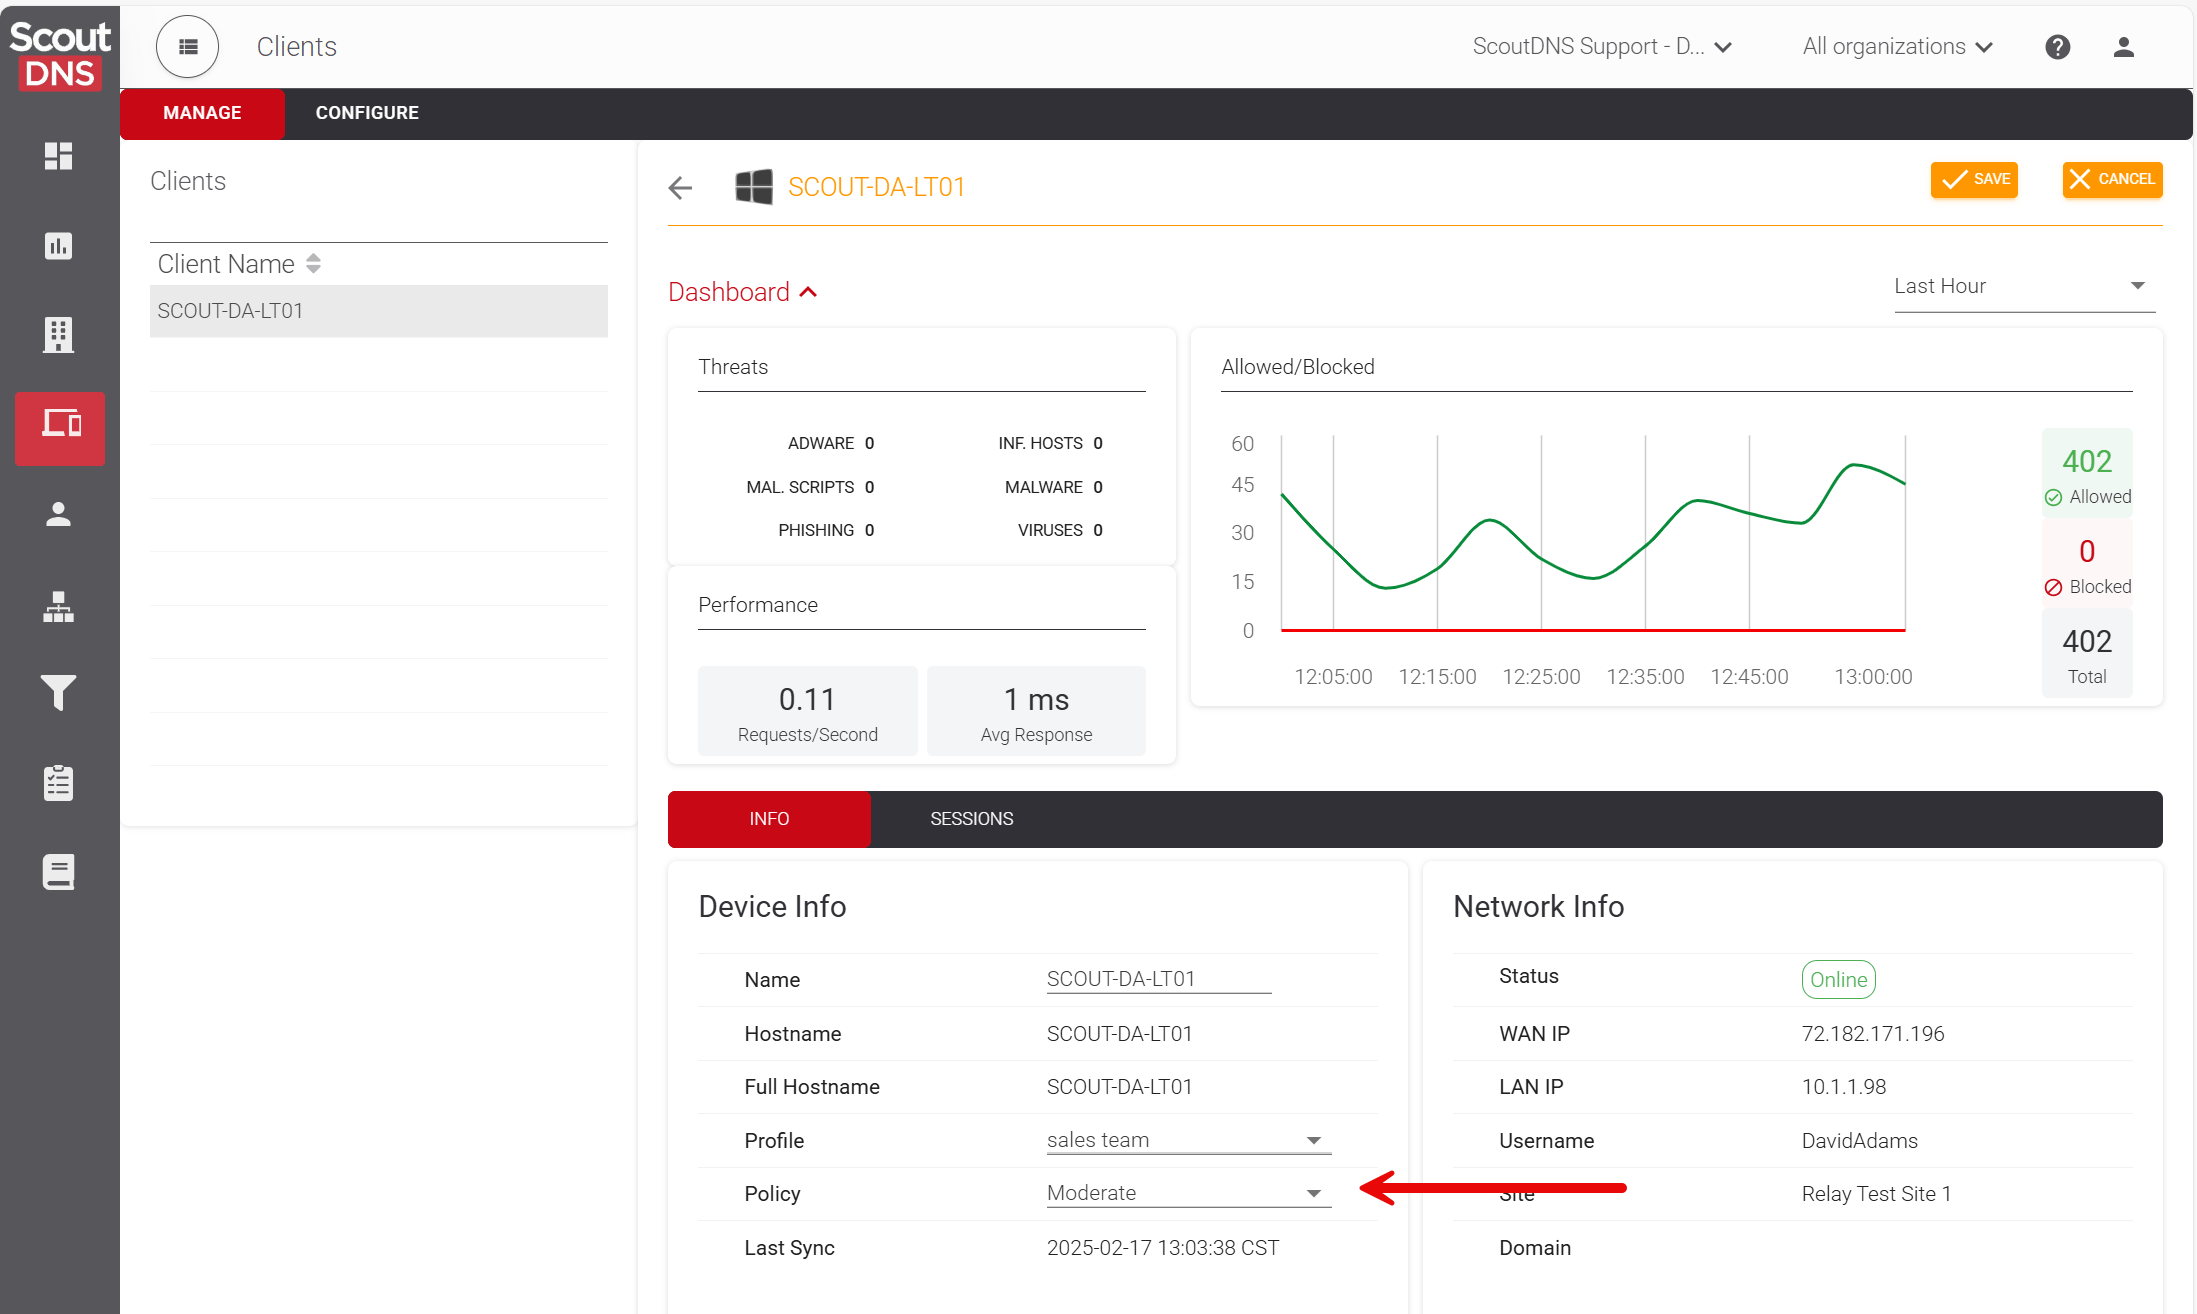
To a device with the roaming agent
- Clients → Manage → select the device.
- Edit Client (top right).
- Under Info, set the Policy dropdown.
- Save.
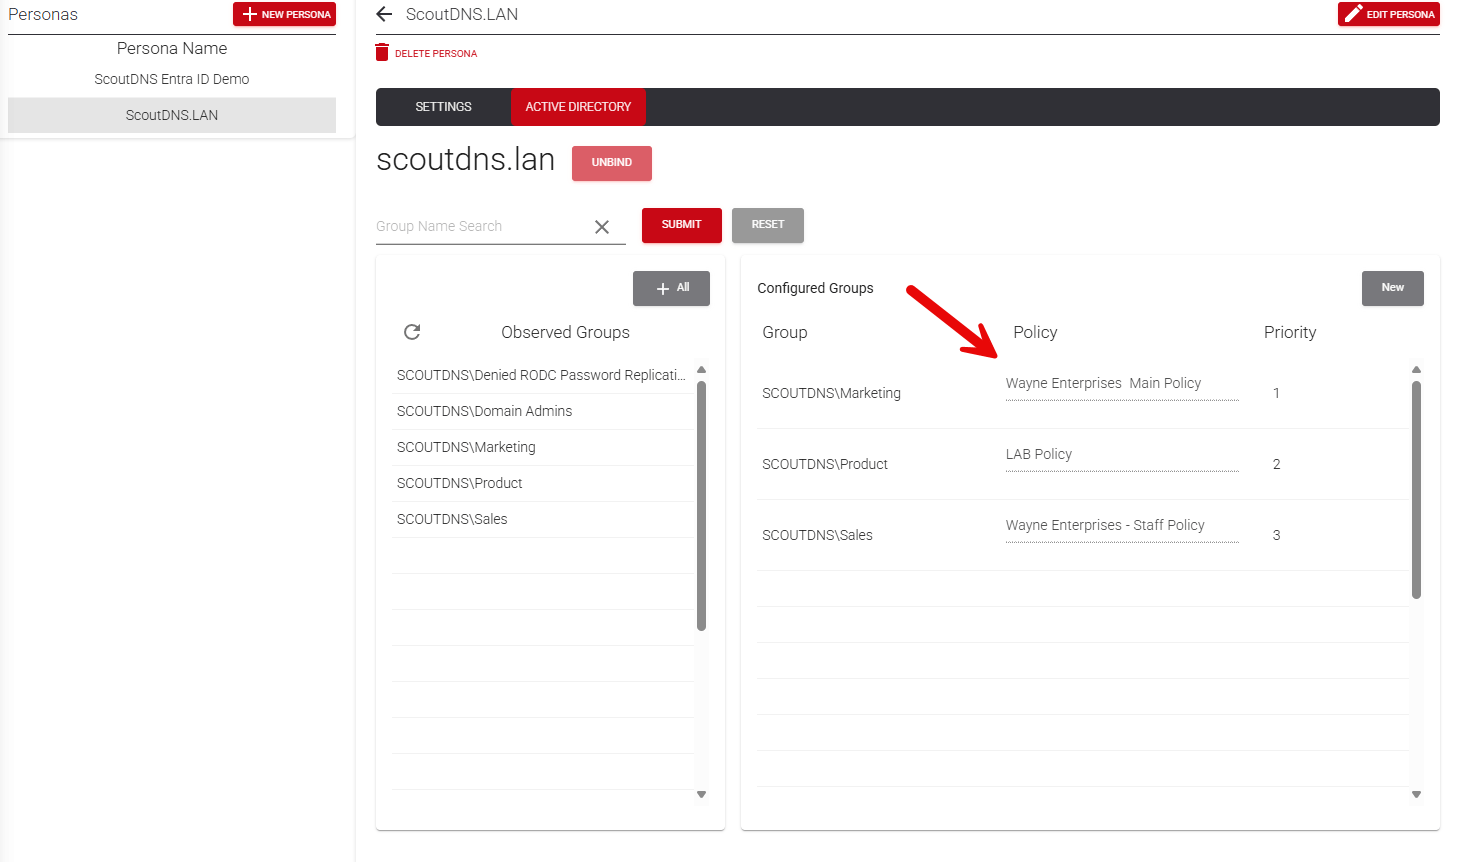
To an Active Directory or Entra ID persona group
- Open the persona → Active Directory subtab.
- Edit Persona (top right).
- Move groups from Observed Groups to Configured Groups.
- Under each configured group, pick the Policy to apply.
- Save.
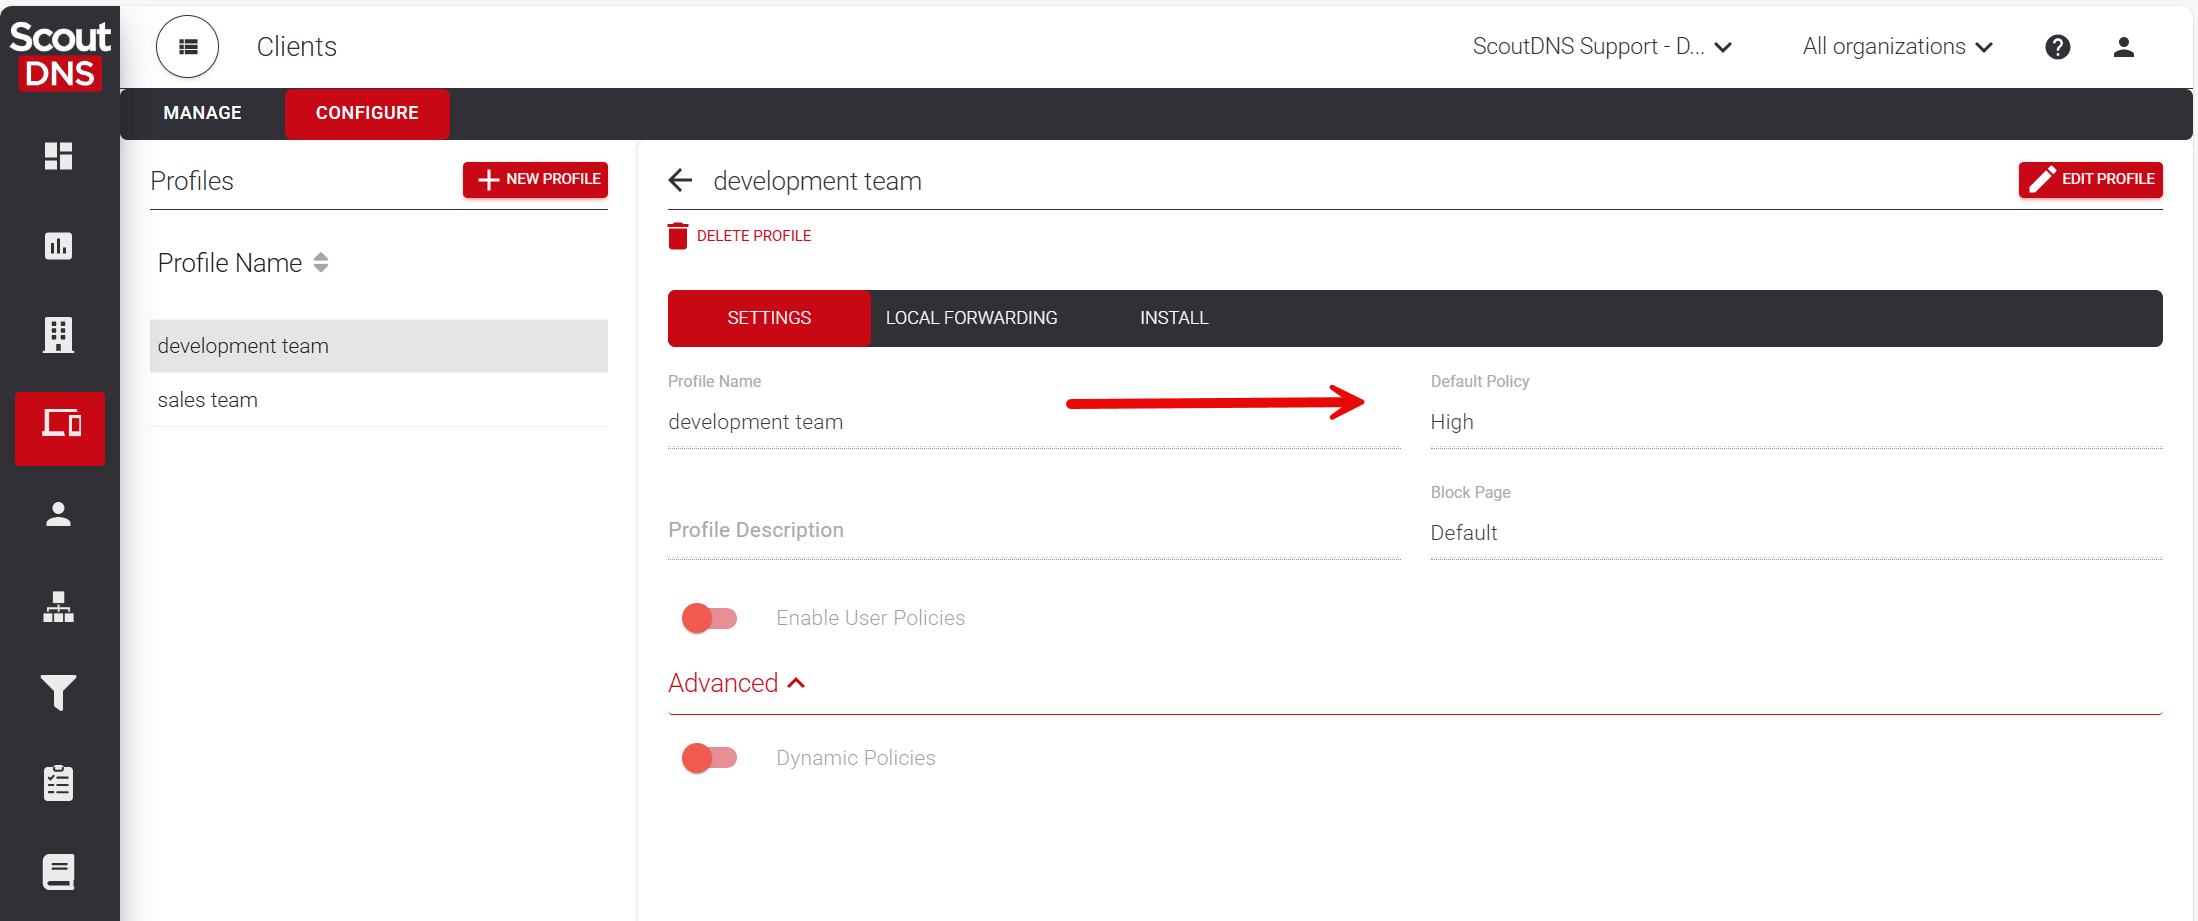
To a device profile (recommended)
- Clients → Configure → select the profile → Edit Profile.
- Under Settings → Default Policy, pick the policy.
- Save.
Every device assigned to the profile inherits the policy.
To an individual device
When you need a special-case policy on one device, you can override both the profile and the policy from the device record:
- Clients → Manage → select the device → Edit Client.
- Set Profile and Policy independently.
- Save.
