Browse Getting Started
- Application categories (Zero Trust app management)
- Active Directory group policies
- Content categories
- Custom block pages
- Don't mix DNS providers
- Prevent DNS bypass
- Safe Search explained
- Safe Search supported search engines
- Security categories
- Working with policies
- Working with allow and block lists
- YouTube Restricted Mode explained
Quickstart: WAN forwarding
Get ScoutDNS protecting your network in minutes by pointing your router or firewall's upstream DNS at the ScoutDNS anycast resolvers.
This is the fastest way to put ScoutDNS in front of every device on your network. You point your router or firewall’s upstream DNS at the ScoutDNS anycast resolvers, register your public WAN IP in the console, and you’re done in minutes.
[!NOTE] If you’re a managed service provider, see the MSP setup guide instead, it covers multi-tenant deployment from the start.
Pick a deployment method
ScoutDNS offers three deployment methods. Most teams start with WAN Forwarding (this guide) and add Relay or roaming clients later as needs grow.
| Method | Best for | Tradeoff |
|---|---|---|
| WAN Forwarding (this guide) | Fastest deployment, BYOD networks, “protect everything behind the firewall” | One policy per WAN IP. Logs show WAN IP only, not per-device LAN IP. |
| LAN Relay | Per-VLAN policy, headless / IoT devices, per-device LAN IP logging, encrypted DNS | Requires an on-prem host or VM running the Relay service. |
| Roaming Client (Scout360) | Off-network protection (laptops on home Wi-Fi or LTE), per-user logging | Requires installing the agent. Can’t protect headless devices. |
[!TIP] Planning to use a Relay later? Configure WAN forwarding first anyway, the Relay needs a configured WAN to register. WAN forwarding is also recommended (not required) for roaming clients so the site is correctly identified.
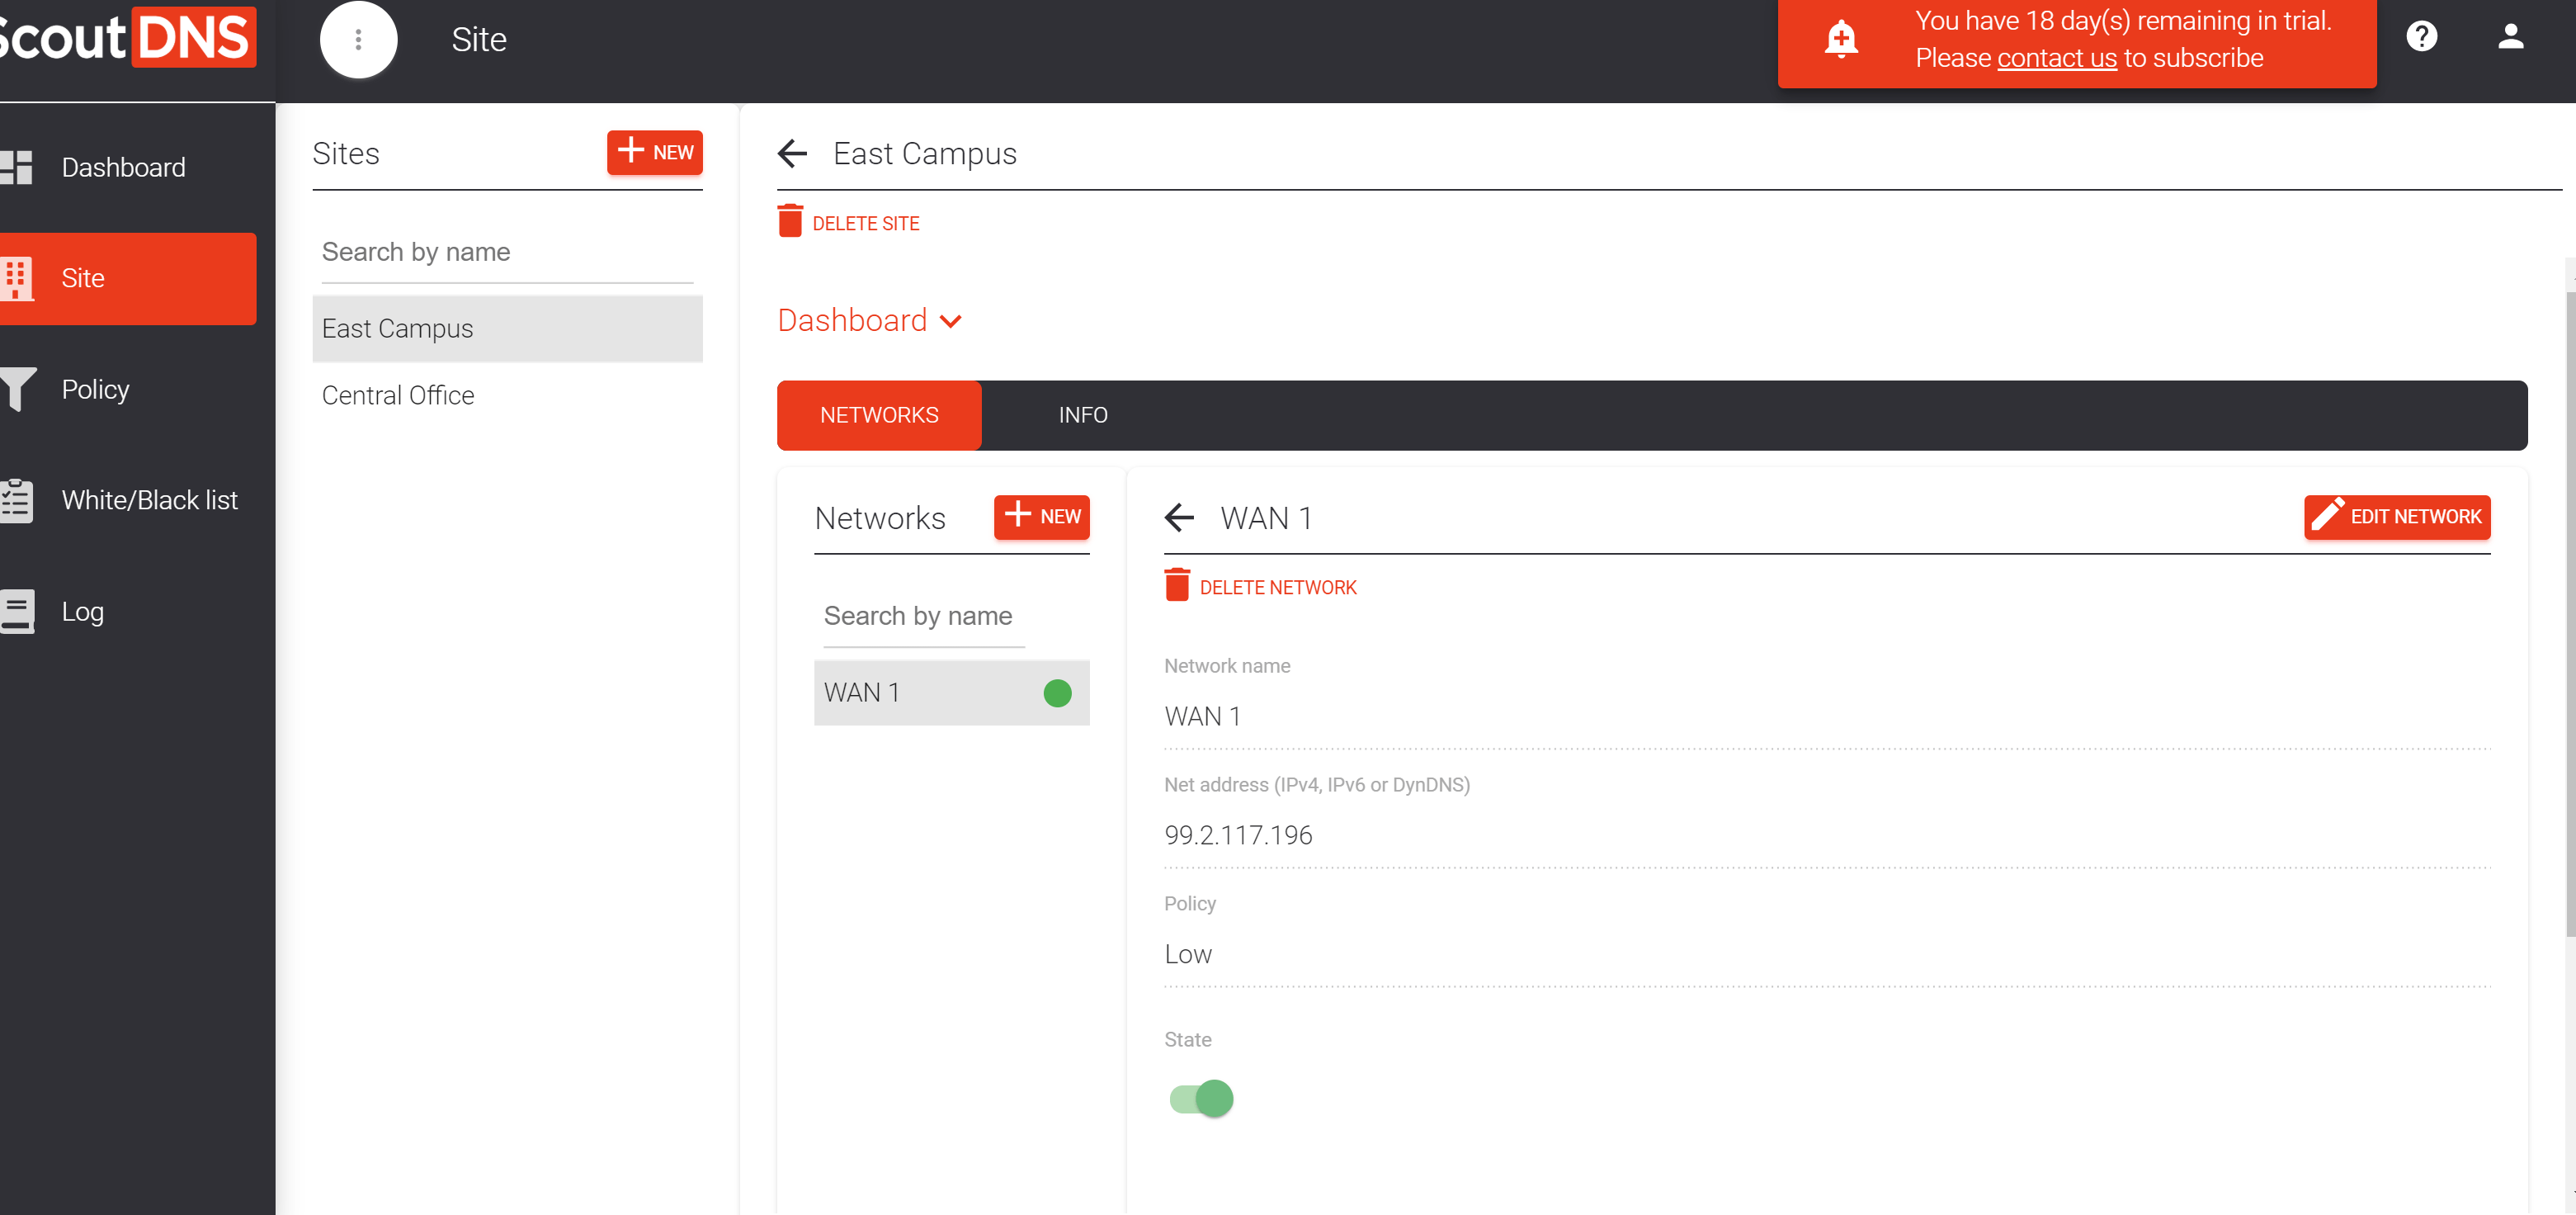
Step 1: Register your network IP
ScoutDNS is a closed resolver: it only answers queries from registered networks. You add a site (a logical grouping like “HQ” or “Dallas Office”), then add one or more networks under that site with your WAN IP.
Create a site
Every network has to live under a site. Each site supports up to four networks by default.
- In the Admin Console, click New Site.
- Enter a name.
- Save.
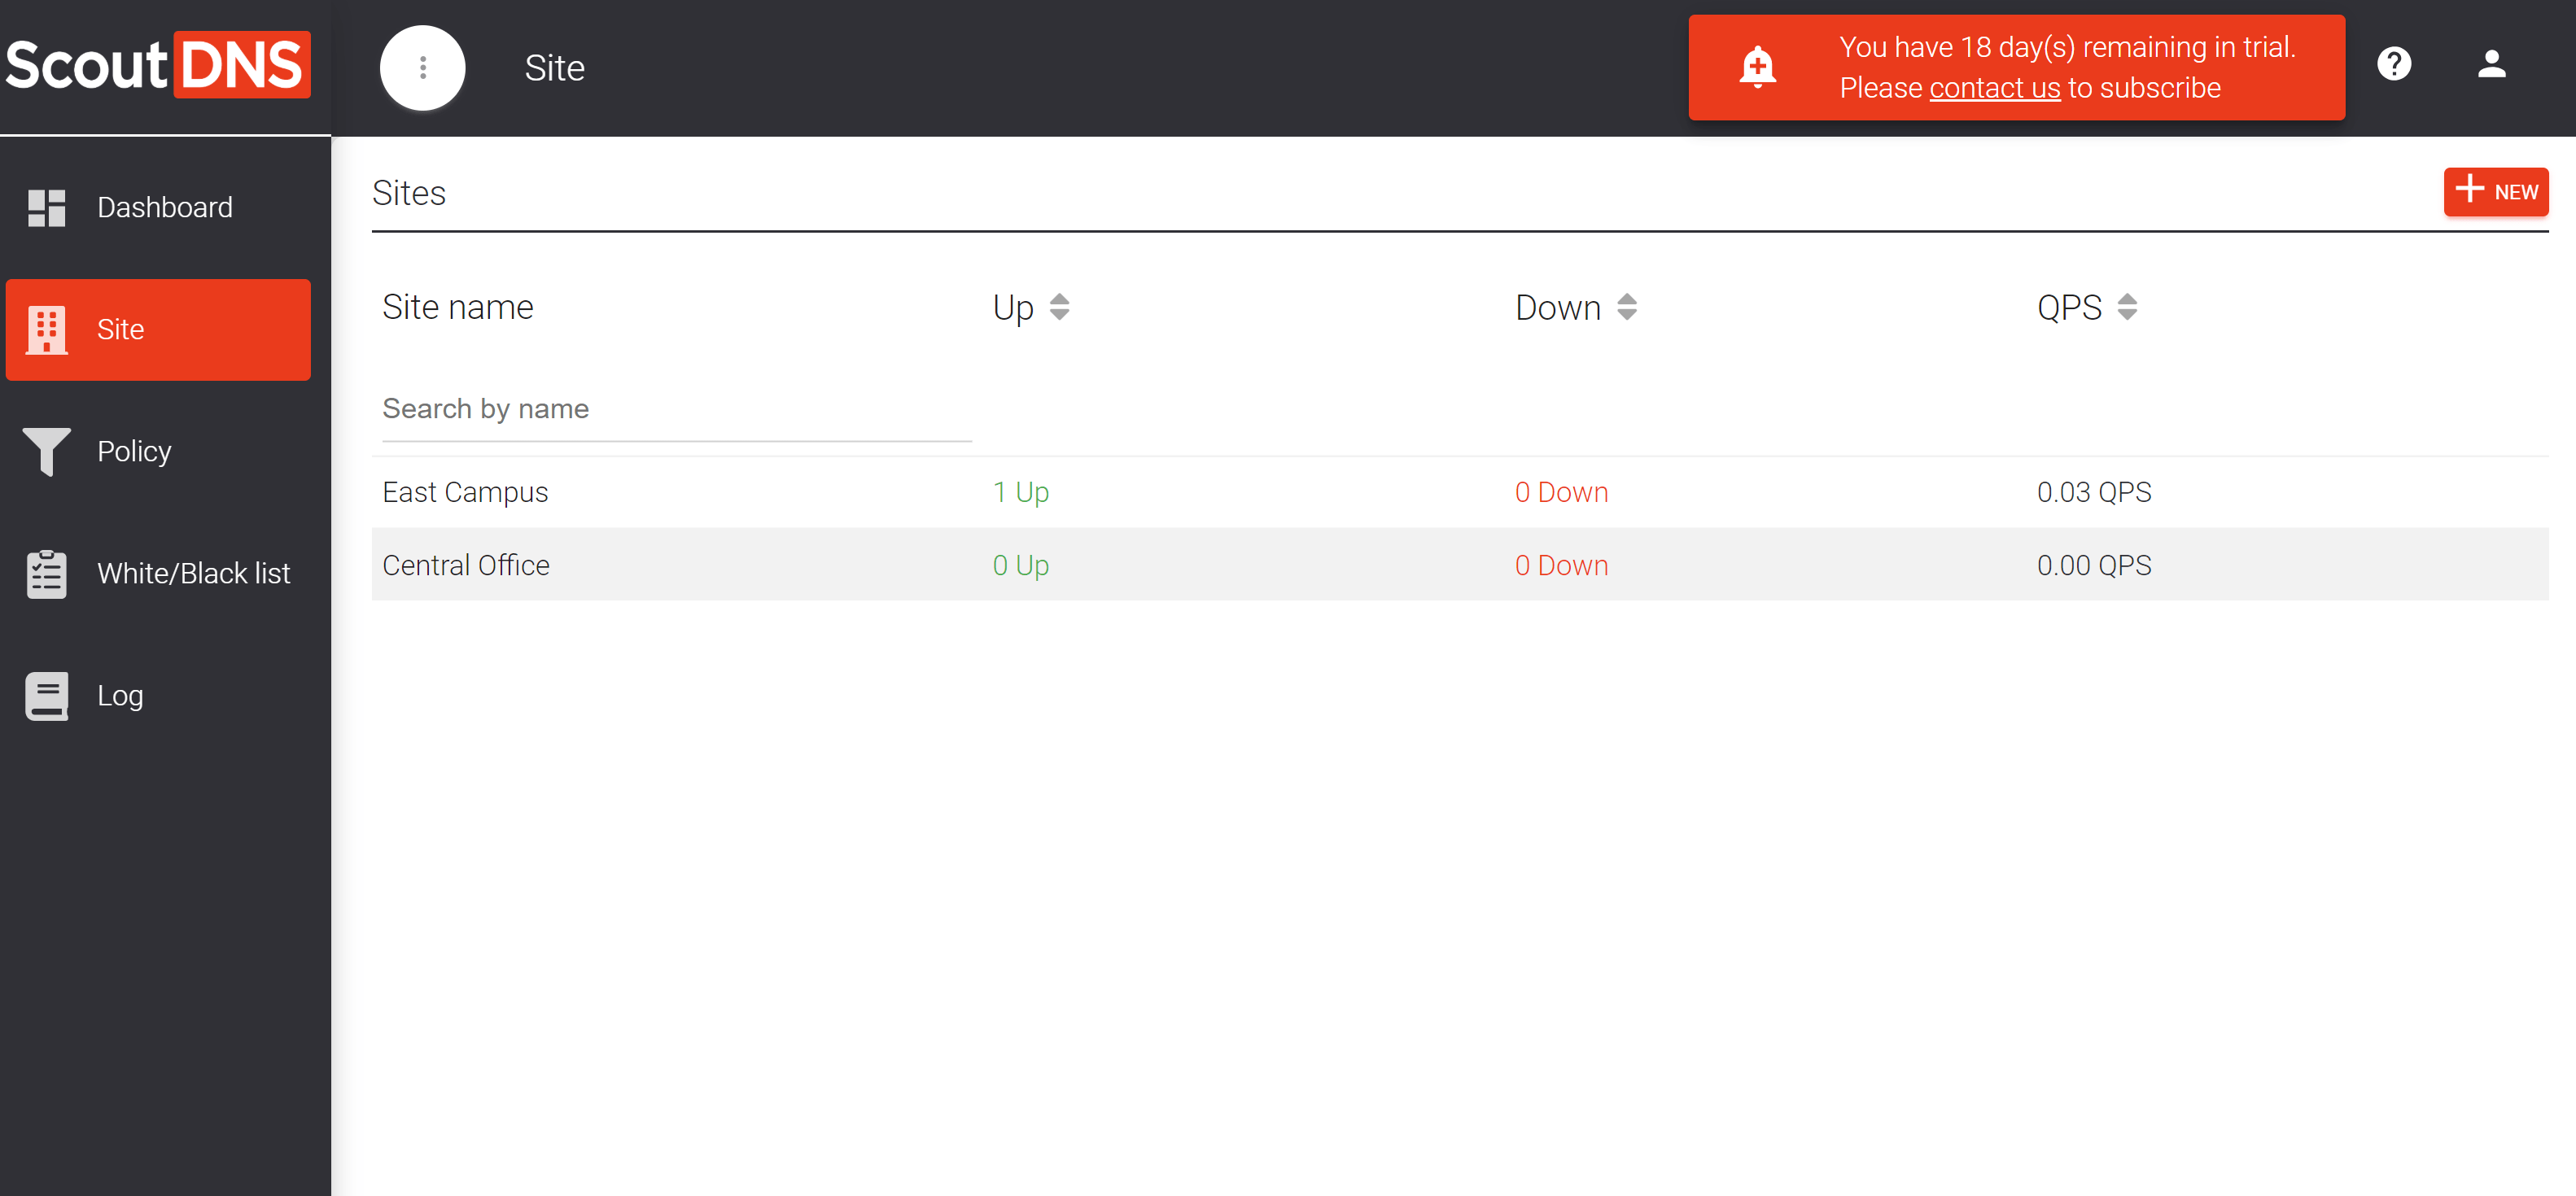
Create a network
- Open the site and click Add Network.
- Enter a name and your public WAN IP address. If your WAN IP changes, see Dynamic IP setup, you can register a dynamic-DNS hostname instead.
- Pick a policy to apply to traffic from this network.
- Click the checkmark to register, then Save.
[!TIP] Not sure what your WAN IP is? Open a browser on the network and search “what is my IP”, Google shows your egress IP at the top of the results.
Step 2: Point your network at ScoutDNS
Change the upstream DNS on the device that sets DNS for the rest of your network, usually your router or firewall, sometimes a separate domain controller.
Locate your DNS configuration
Find the device that hands out DNS to client machines. This is typically:
- The router or firewall (most small networks)
- The DHCP server (the device that hands out IP leases usually also configures DNS)
- The Active Directory domain controller in Windows environments
For AD environments, refer to the Active Directory policies article for the recommended pattern (forwarders on the DC, not direct client DNS changes).
Update the DNS server addresses
Replace the upstream DNS IPs with the two ScoutDNS anycast resolver IPs shown in the Admin Console. ScoutDNS runs a global Anycast network so the same two IPs work from anywhere with the lowest available latency.
Example: SonicWall DNS settings.
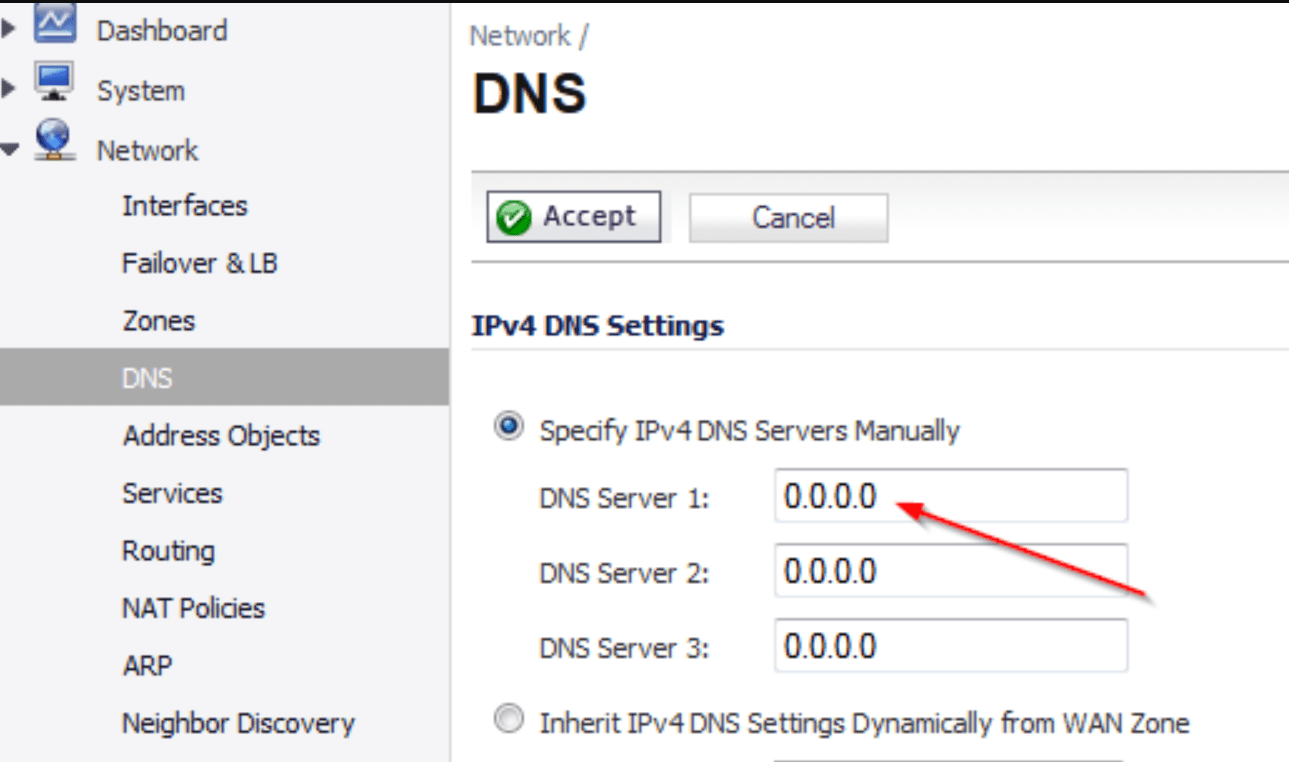
[!IMPORTANT] Set DNS to static, not “auto” or “from ISP.” And write down the previous DNS server IPs before you change them, in case you need to revert.
[!WARNING] Tech-savvy users may override your DNS at the device level to bypass filtering. To block this, see Prevent DNS workarounds, it covers firewall rules that force all port-53/853/443 DNS traffic through ScoutDNS.
Restart clients or clear caches
Clients pick up the new DNS in one of two ways:
- DHCP-assigned DNS, reboot or reconnect the client to pull the new DNS via DHCP renewal
- Static DNS / domain controller, flush the OS DNS cache and any browser DNS cache
If you run a DNS proxy upstream, clear its resolver cache too. The change won’t apply to cached records until the proxy refreshes.
Verify
Open a browser on a client device and visit verify.scoutdns.com. You should see a “Protected by ScoutDNS” confirmation page.
[!NOTE] In some setups (especially with a DNS proxy in the path), the verify page won’t register even though DNS is correctly flowing through ScoutDNS. As a backup, open Activity → Live Queries in the Admin Console, you should see queries appearing from your WAN IP.
If you don’t see queries arriving after 30 seconds:
- Confirm the WAN IP registered in the console matches your actual public egress IP (check with “what is my IP”).
- Confirm the client really is using the ScoutDNS resolvers (
nslookup verify.scoutdns.comon the client should resolve via the ScoutDNS IPs). - Confirm there’s no upstream DNS-over-HTTPS that’s bypassing the resolver change (some browsers force their own DoH).