Browse Policies & Filtering
- Application categories (Zero Trust app management)
- Active Directory group policies
- Content categories
- Custom block pages
- Don't mix DNS providers
- Prevent DNS bypass
- Safe Search explained
- Safe Search supported search engines
- Security categories
- Working with policies
- Working with allow and block lists
- YouTube Restricted Mode explained
Custom block pages
Brand the page users see when ScoutDNS blocks a domain. Configure separate content-block and threat-block templates, assign per WAN and per device profile.
When ScoutDNS blocks a domain, end users see a block page rendered by the ScoutDNS block-page service. You can edit the default page and create multiple custom variants, then assign them per WAN (for site-based deployments) or per device profile (for roaming clients).
Block-page faces
Every block page has two faces, separate templates for content blocks vs threat blocks. End users see whichever face matches the reason for the block.
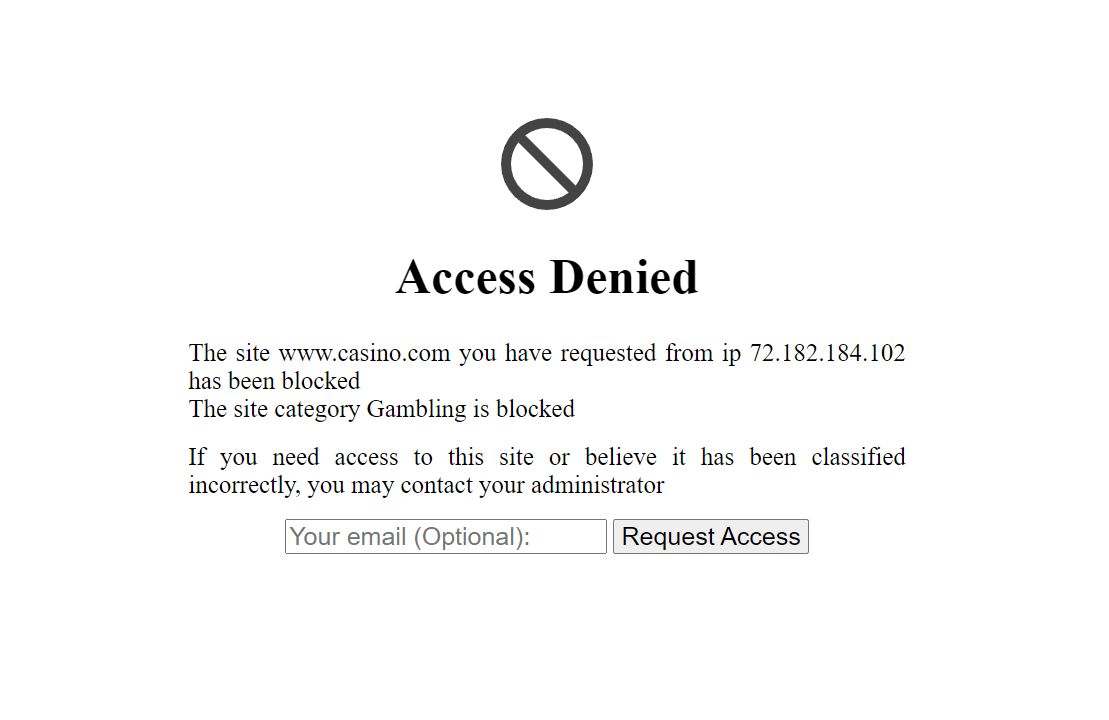
Content block face
Shown for content-category, application, and allow/block-list blocks (e.g. “this domain is in the Social Media category”).
Threat block face
Shown for threat-category blocks (e.g. phishing, malware, C2).
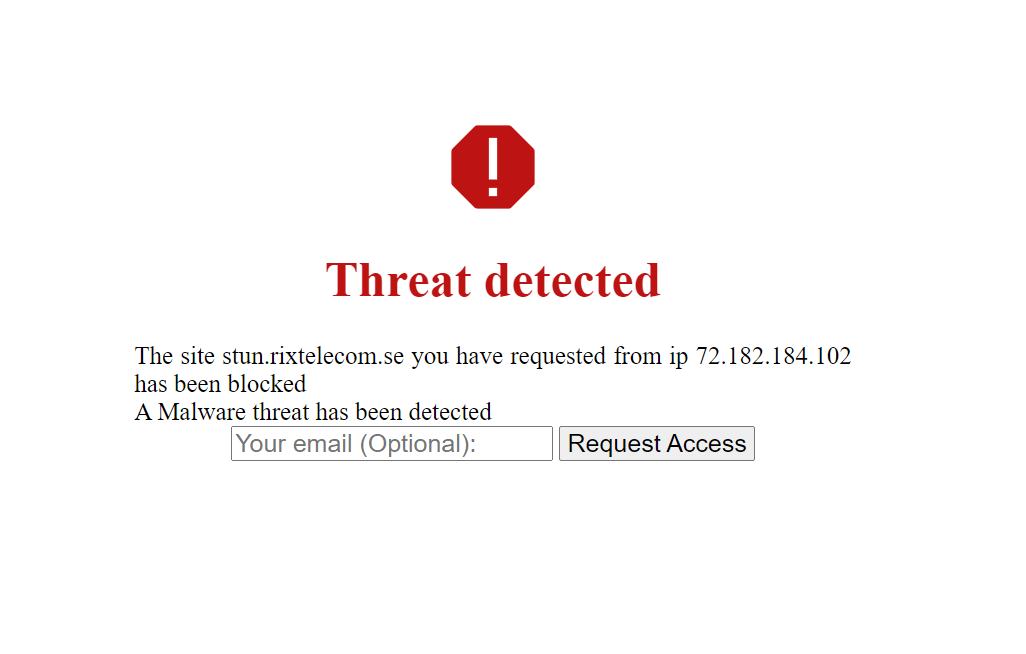
[!NOTE] The threat face header cannot be changed, it’s a fixed warning string. You can still set the logo, logo message, and other components on the threat face.
Block-page components
Seven configurable parts.
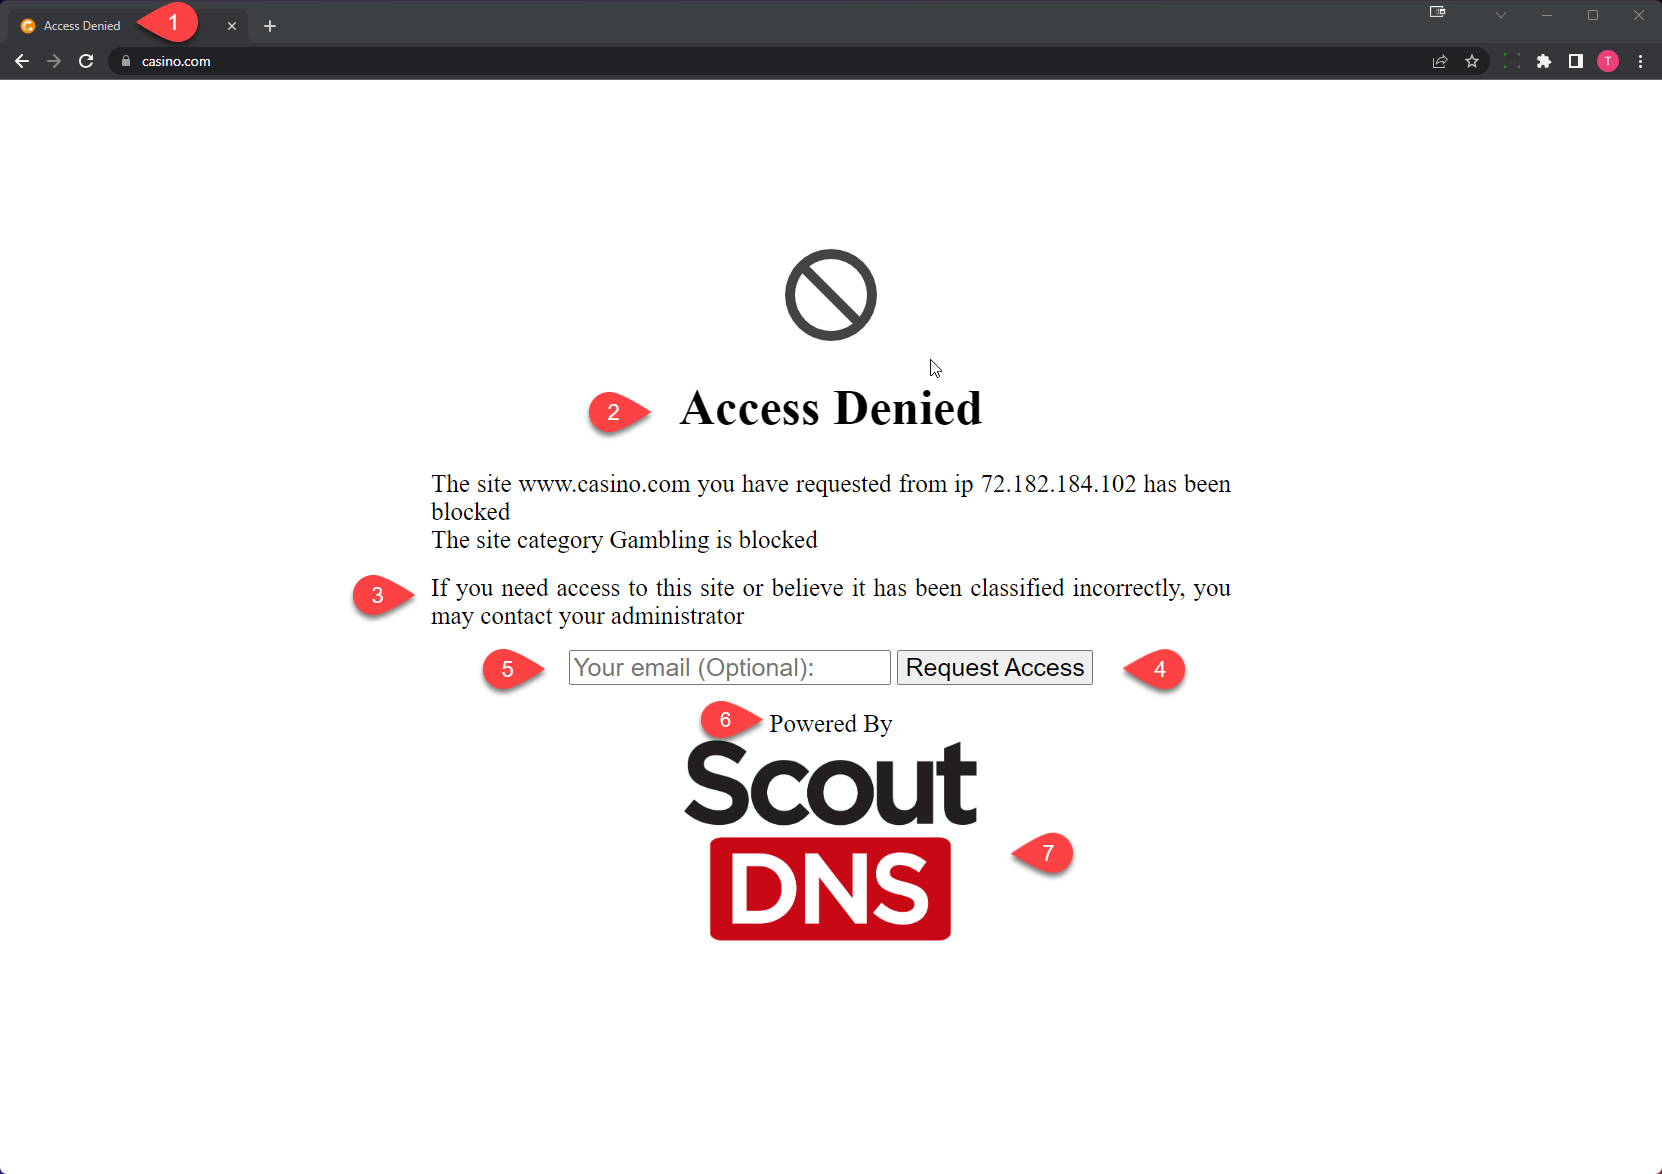
| # | Component | What it sets |
|---|---|---|
| 1 | Page Title | HTML <title> tag |
| 2 | Header | Large bold header (content face only) |
| 3 | Block Page Message | Body response message |
| 4 | Request Access Button | Lets end users request access from admin. On/off. |
| 5 | End-User Email Address | Optional field for the end user’s email when requesting access. On/off. |
| 6 | Logo Message | Short tagline above the logo |
| 7 | Logo | Custom logo image, recommended 400×400 PNG or JPG |
Create and edit block pages
-
Click the profile icon (top right) → Configure Block Page.
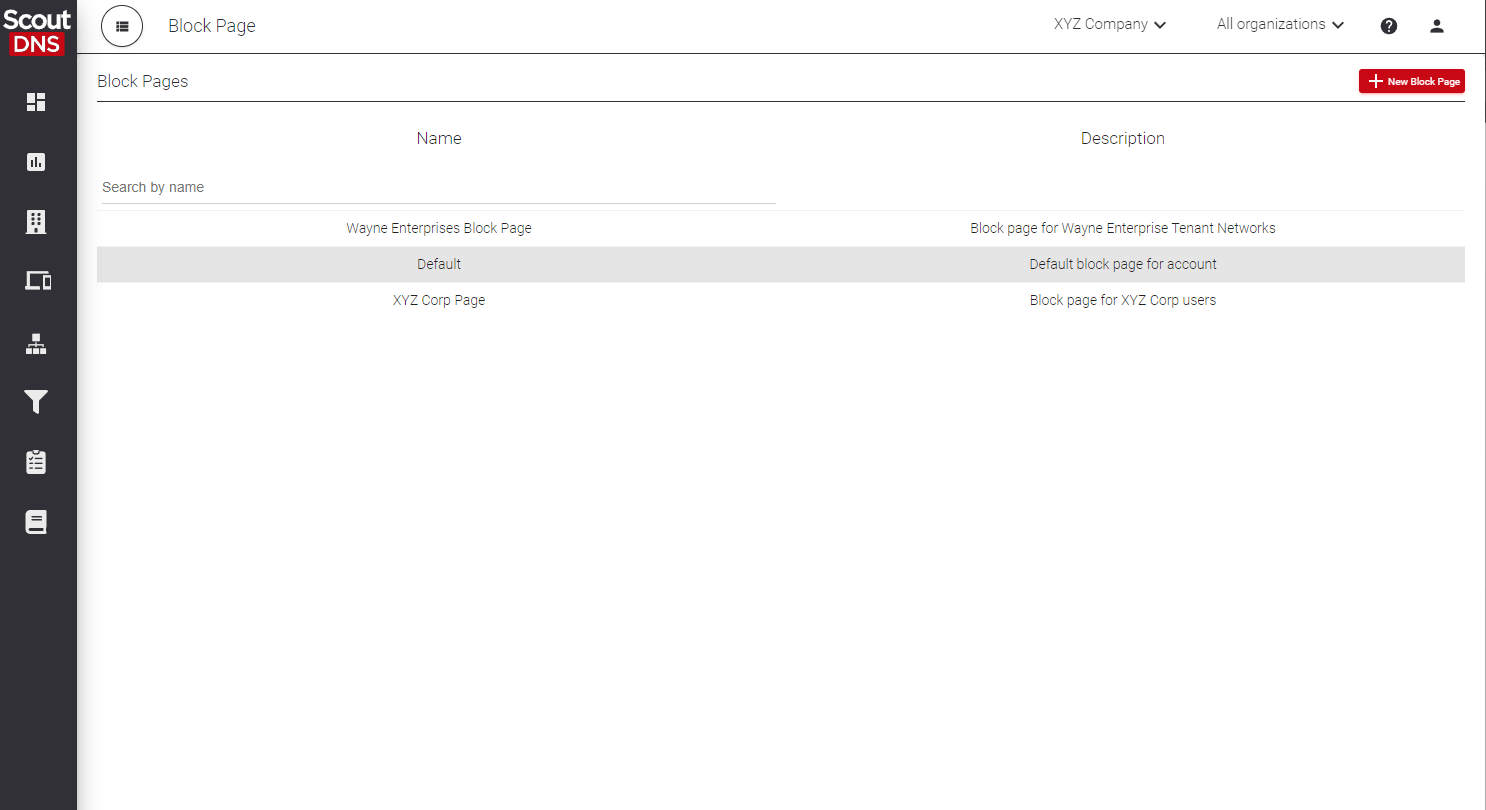
-
The list view shows every block page you’ve created. Select an existing page to edit, or click New Block Page.
Editable fields
| Field | Notes |
|---|---|
| Name | Reference name. The Default Page name cannot be changed. |
| Description | Free text for other admins. |
| Page Title | HTML title tag. |
| Heading | Large heading under the block icon (content face only). |
| Response | Short message to end users. Good place for “Contact IT” instructions. |
| Review Request Toggle | Show/hide the Request Access button. |
| Email Input | Show/hide the end-user email field for access requests. |
| Override Default Email | Custom destination for access requests; overrides the account default. |
| Insert Logo | Toggle to upload and show a custom logo. |
| Logo Message | Caption above the logo. |
| Choose File | .png or .jpg; recommended 400×400. |
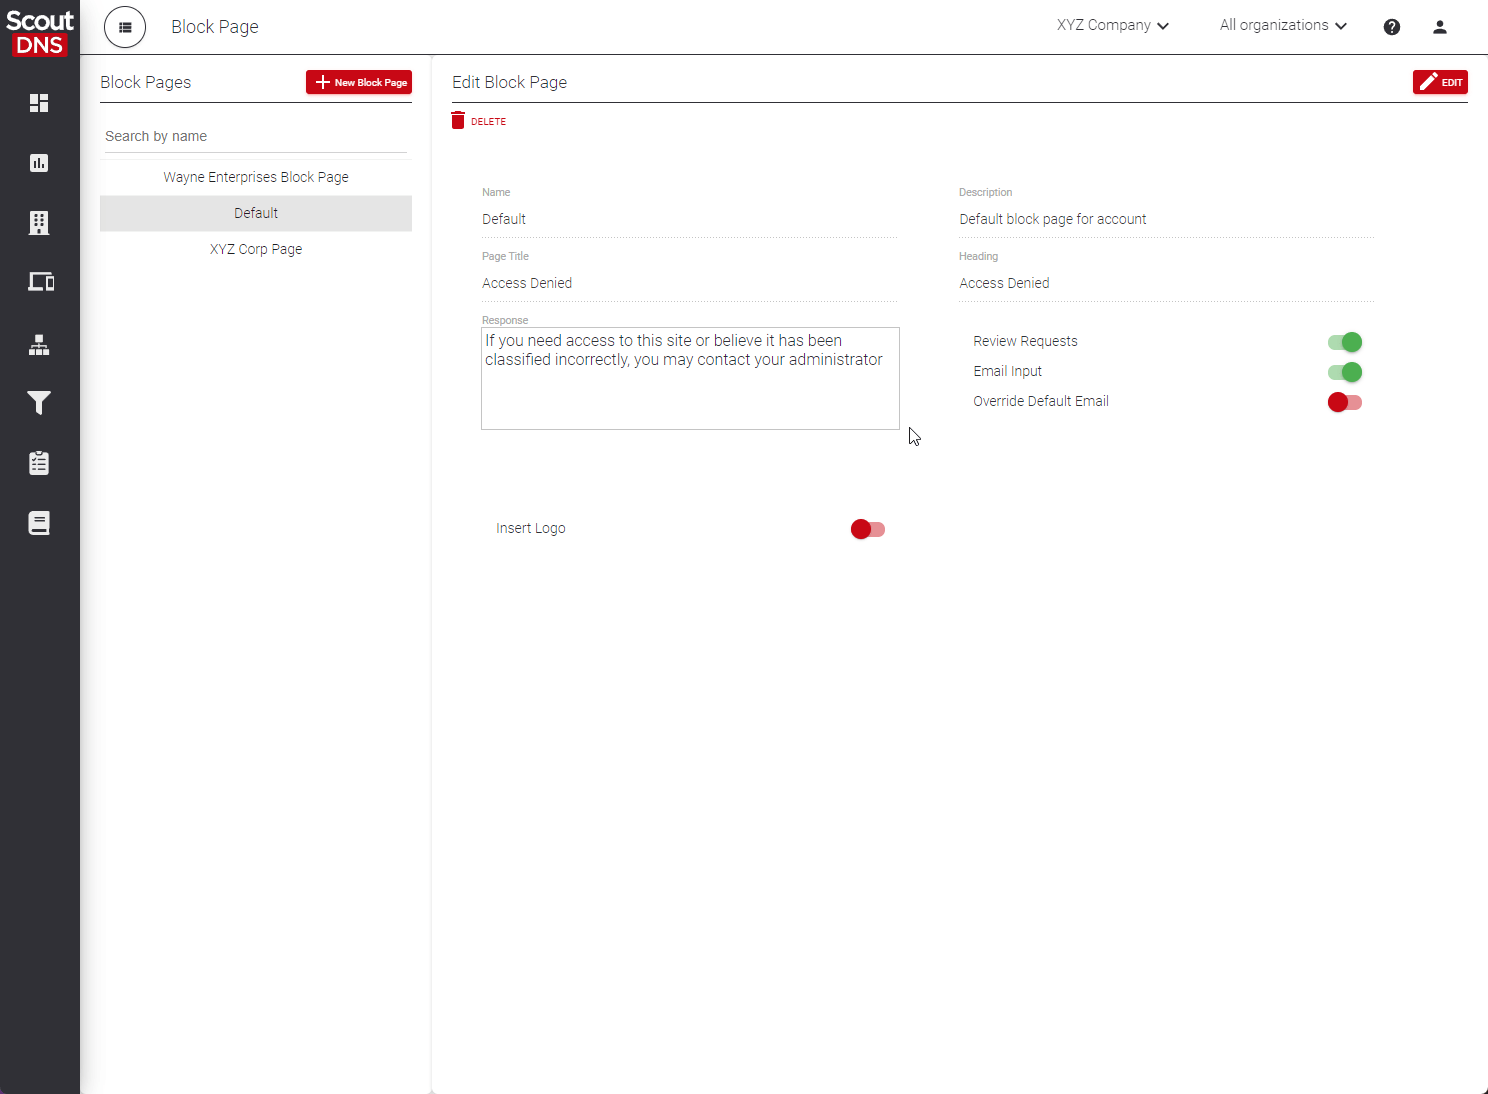
The Default block page
The Default block page is applied automatically to any WAN or device profile that hasn’t been assigned a custom page. Edit it once and every new or unassigned location/profile picks up your branding automatically.
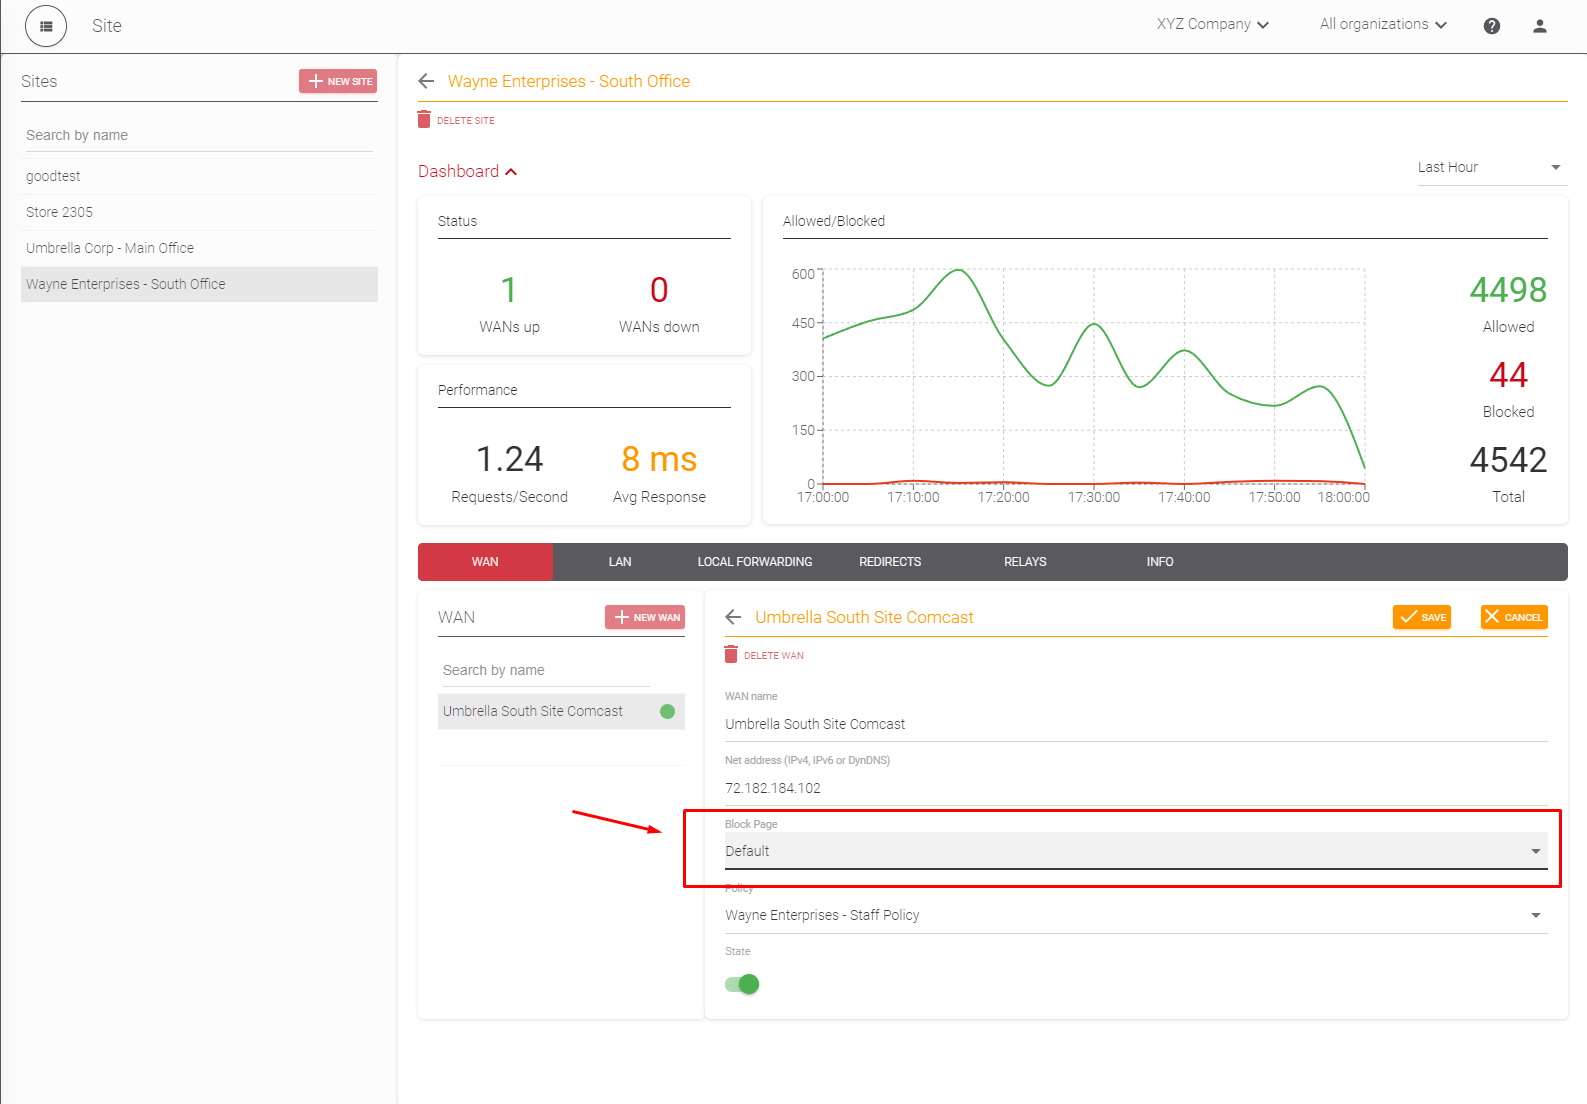
Assign a block page
Block pages are assigned per WAN (for site-based deployment) and per device profile (for roaming clients).
To a WAN
- Open the site → WAN subtab → click the WAN to edit.
- Pick a page from the Block Page dropdown.
- Save.
Every client behind that WAN IP sees the assigned page when a block occurs.
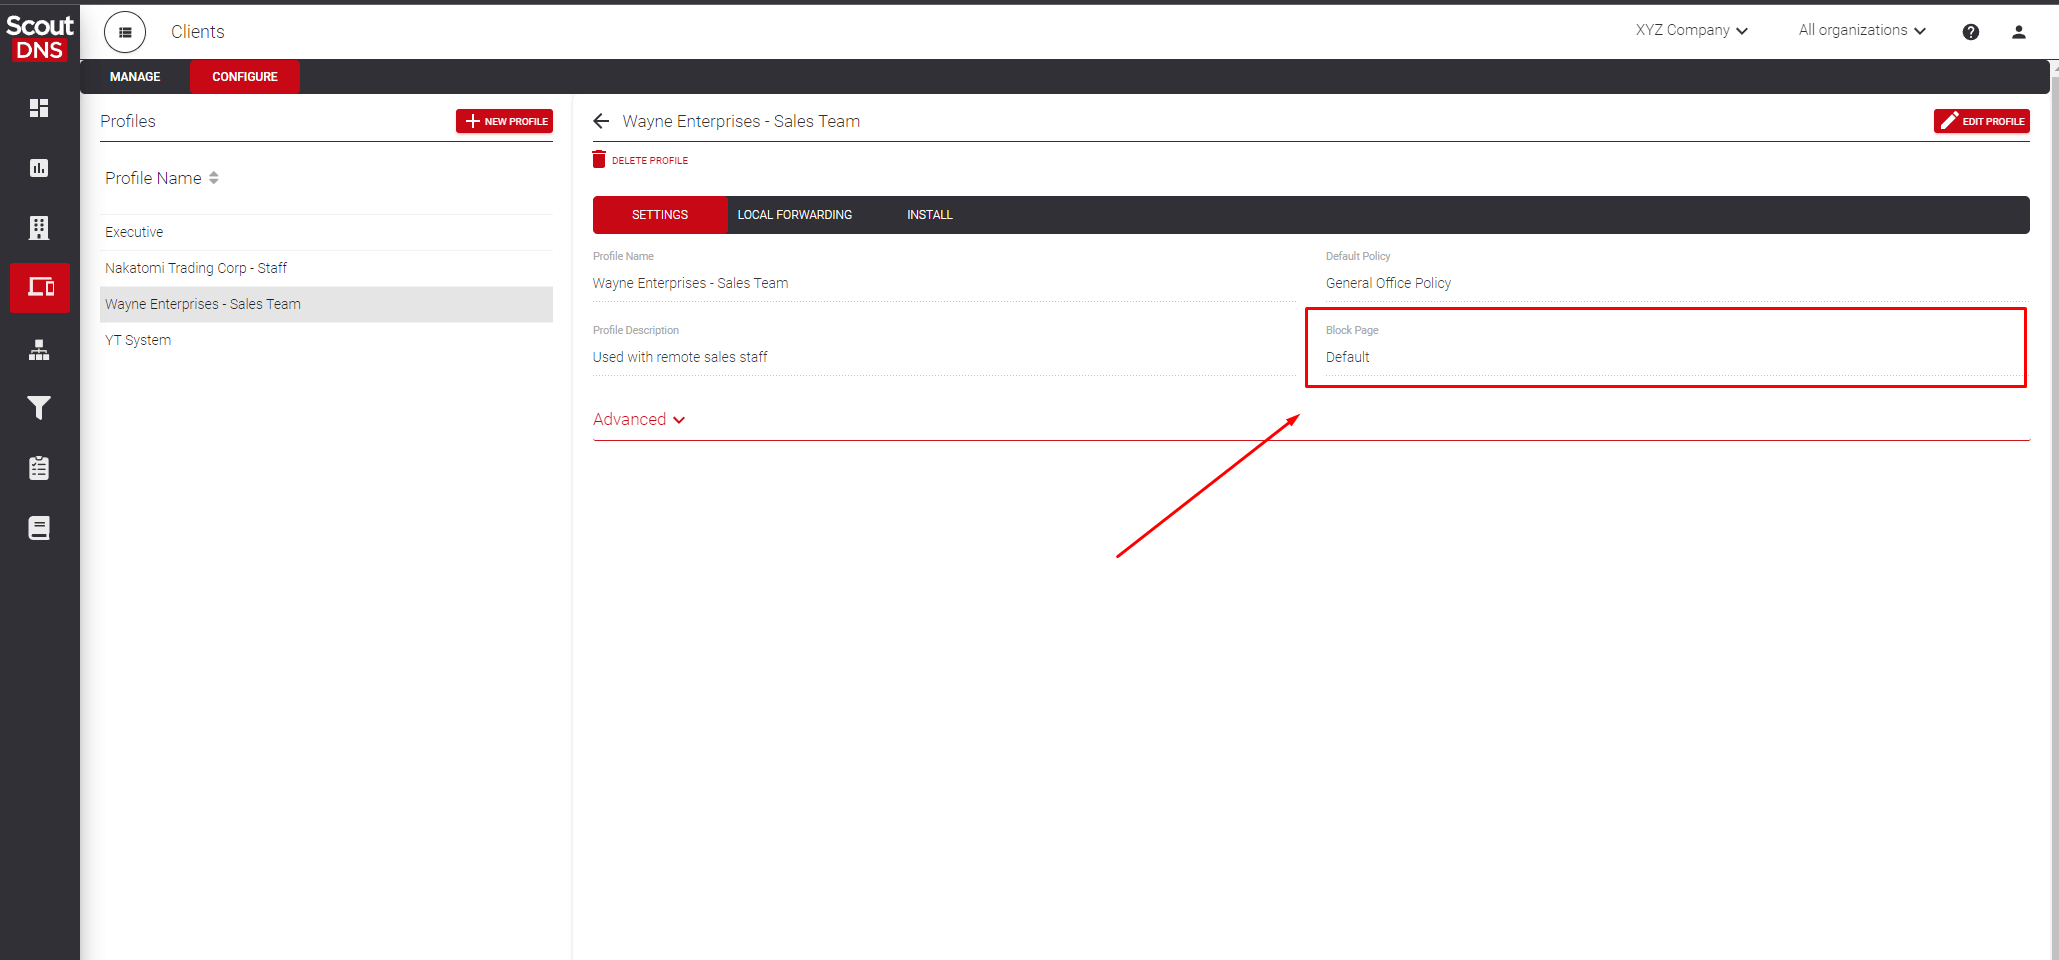
To a device profile
- Open the profile → Edit Profile.
- Pick a page from the Block Page dropdown.
- Save.
[!IMPORTANT] Roaming-client block pages always win over WAN block pages. When a device with the agent is sitting behind a configured WAN, the profile’s block page is what renders, not the WAN’s. Use this to keep branding consistent regardless of network.
Related
- Working with policies, what triggers a block in the first place
- Working with allow and block lists, custom domain overrides that trigger the content face
- Roaming clients (device agents), profile assignment
- Install ScoutDNS certificate for browser HTTPS errors, needed so block pages render cleanly on HTTPS sites