Browse Deployment & Clients
- Dashboard overview
- Insights overview
- Sites Overview - Network Deployments
- Policies Overview - Create and Edit
- Custom Lists overview
- Clients Overview - Device Agents and Profiles
- Users Overview - Directory Users and Personas
- Organizations Overview - MSP Tenant Management
- Lookup Tool Overview
- Query Log Overview
- Settings Overview - Account Administration
- Help & Support Overview
- Signing In - Login, 2FA, and Password Reset
- Two-factor authentication (2FA)
- Add system users (role-based access)
- Check domain classification with the Lookup Tool
- Configurable objects and their associations
- Configure notifications
- Working with organizations (multi-tenant)
- Working with policies
- Content categories
- Security categories
- Application categories (Zero Trust app management)
- Working with allow and block lists
- Zero Trust TLD Filters
- Safe Search explained
- Safe Search supported search engines
- YouTube Restricted Mode explained
- Custom block pages
- Prevent DNS bypass
- Don't mix DNS providers
- Active Directory group policies
- Entra ID group policies
- Tracking individual users
Roaming clients (device agents)
Install the ScoutDNS device agent on Windows and macOS: zero-touch profile-keyed installs, encrypted DoH, per-user reporting, dynamic policy.
The ScoutDNS device agent (Scout360) is a lightweight client that keeps managed devices protected wherever they are, home Wi-Fi, hotels, coffee shops, LTE. Installs are silent, profile-keyed, and self-updating. The agent uses DNS-over-HTTPS (DoH) on port 443 so traffic looks like normal HTTPS to any in-path network appliance.
Key capabilities:
- Zero-touch silent installs. Dynamically generated install files have profile keys embedded, so no extra input is required during deployment.
- Encrypted DNS via DoH on port 443.
- On- and off-network protection. The agent keeps filtering active even when the device leaves your corporate network.
- Granular reporting. Per-device and per-user logs become available once the agent is installed.
- Dynamic policy. A profile can apply different policies based on whether the device is on a ScoutDNS-configured network or off-site.
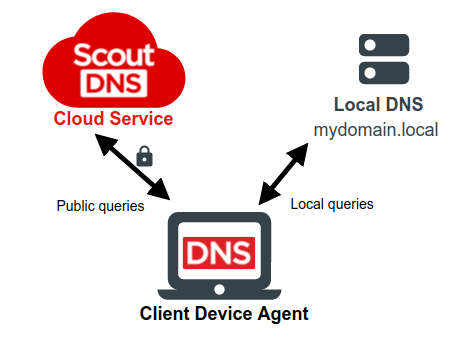
How the agent works under the hood
Two services run on each protected device:
Device Agent
- On startup and at every network change, the agent records the existing network DNS servers and any joined domains. This info is used to handle local queries correctly (such as queries for
*.corpor other local-only domains). - Connectivity check. If ScoutDNS is reachable, the agent binds
127.0.0.1:53(IPv4) and::1(IPv6) on the loopback adapter and intercepts DNS. - Fail-open behavior. If ScoutDNS can’t be reached, the agent restores the device’s original DNS settings. It keeps polling and reverts to ScoutDNS as soon as the service is reachable again.
- Continuous monitoring. The agent watches for network, user, and device changes and adjusts settings accordingly.
Device Agent Updater
- Runs as a separate service to keep the agent on the latest version.
- Backs up the current binary before installing an update.
- Updates happen in the background within seconds, no user prompts.
- If a freshly installed update can’t reach ScoutDNS, the updater automatically rolls back to the last working version.
Step 1: Configure a profile
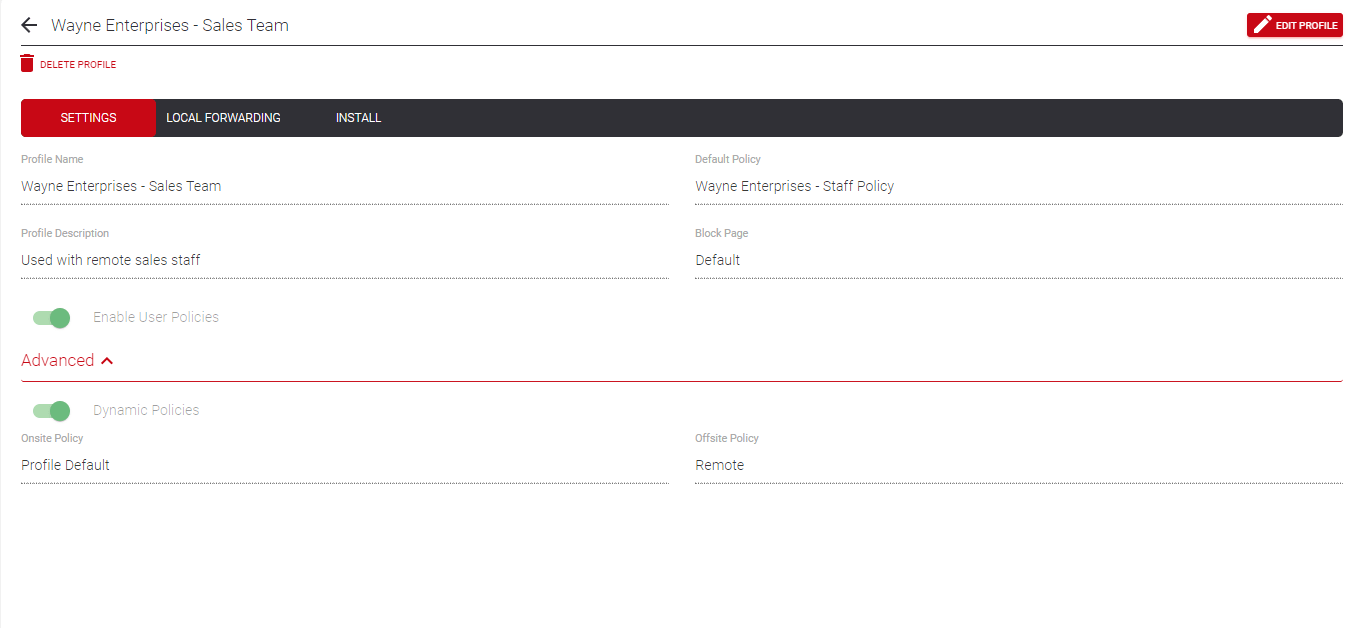
Profiles link policies to groups of client devices. Every device installed with a given profile key inherits that profile’s settings.
Profile options
| Field | What it controls |
|---|---|
| Profile Name | A label like “Sales Team”, “Office Staff”, or “Engineers” |
| Default Policy | The fallback policy the device uses unless something more specific applies |
| Description | Free-text note for internal reference |
| Block Page | The custom block page template applied to this group |
| Enable User Policies | Lets Active Directory policies override the profile policy when matching groups exist in Personas |
| Dynamic Policies (under Advanced) | Apply different policies based on device location (on a ScoutDNS-configured network vs roaming) |
When Dynamic Policies is enabled, you can:
- Assign a specific policy per location, OR let the device inherit site/network rules whenever it connects to a ScoutDNS-configured network.
- Assign a different policy for off-site / roaming devices.
- Site detection is based on your configured ScoutDNS sites and networks.
[!TIP] Use multiple profiles when users are assigned specific devices. If you can identify users via Active Directory instead, prefer fewer profiles plus AD-group-based Personas, easier to manage at scale.
Local forwarding (default behavior)
By default, the agent records the local resolvers found on each network it joins and forwards these query types to them automatically:
- Designated local domains like
.local, plus local reverse lookups. - Assigned domains for devices joined to an Active Directory.
The default forwarding handles most networks correctly. For special cases (some VPN configurations, devices that aren’t yet domain-joined), use the Local Forwarding tab on the profile.
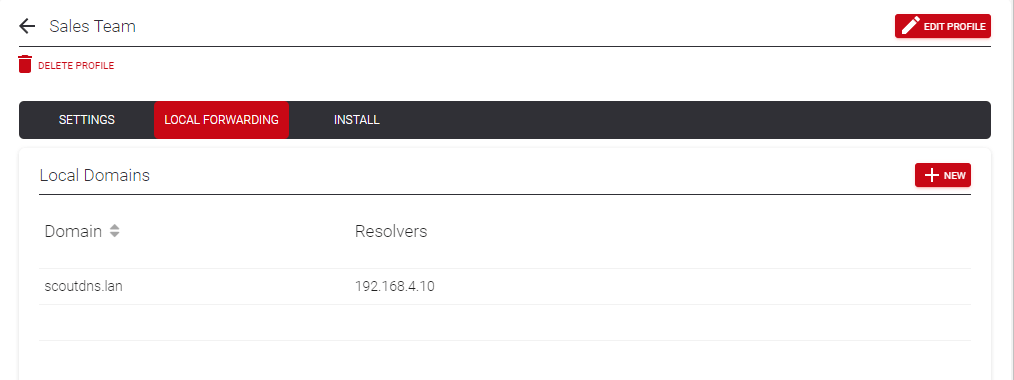
Assign local forward zones
Create explicit forward-zone rules when you need precise control:
| Setting | Behavior |
|---|---|
| Domain | The domain you want to forward (e.g. corp.example.com) |
| Resolvers: Auto | Forward to discovered local resolvers first; fail through to ScoutDNS via WAN if they don’t respond |
| Resolvers: Specific IPs | Forward only to the listed resolver IPs (up to 4), in order; fail through to ScoutDNS via WAN if all fail |
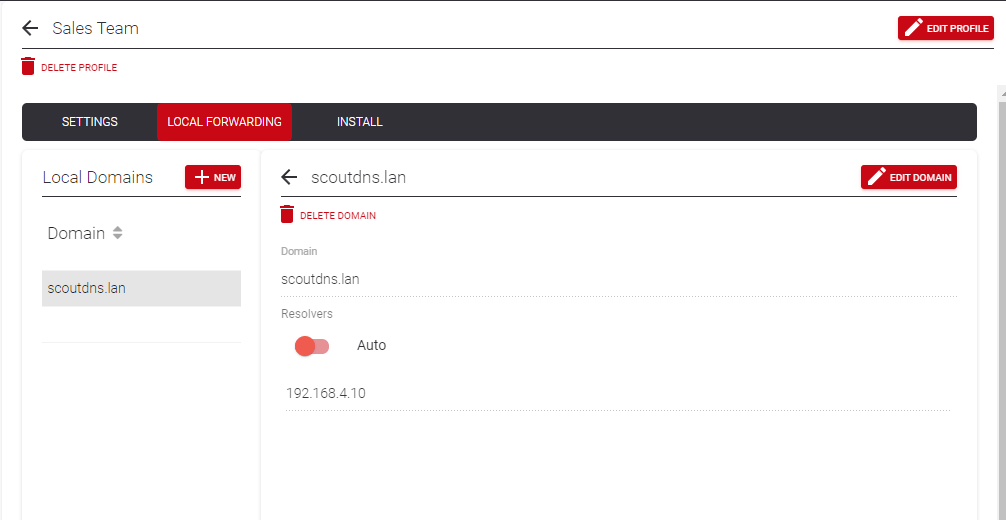
[!NOTE] Default forwarding works for most networks. Explicit local forward zones are most useful with certain VPN configurations or for clients that aren’t joined to an Active Directory service yet.
Step 2: Generate install files
Install files are dynamically generated from the profile, with the install key embedded so no command-line flags or post-install configuration are needed.
-
Open the profile’s Install tab and click New Install Key.
-
Configure the key:
Option Values Platform Windows (V1 agent), Windows (V2 - beta), or Mac OS Architecture (Windows) x86 (32-bit) or x64 (64-bit) Architecture (macOS) x86 (Intel) or ARM (Apple Silicon / M-series) Duration How long the install key remains valid for auto-registration (1 hour up to 30 days, or Indefinite) Max Installs Maximum number of registrations this key can authorize -
Click Generate key.
-
Expand the new key and click Download under Packaged Installer to retrieve the installer.
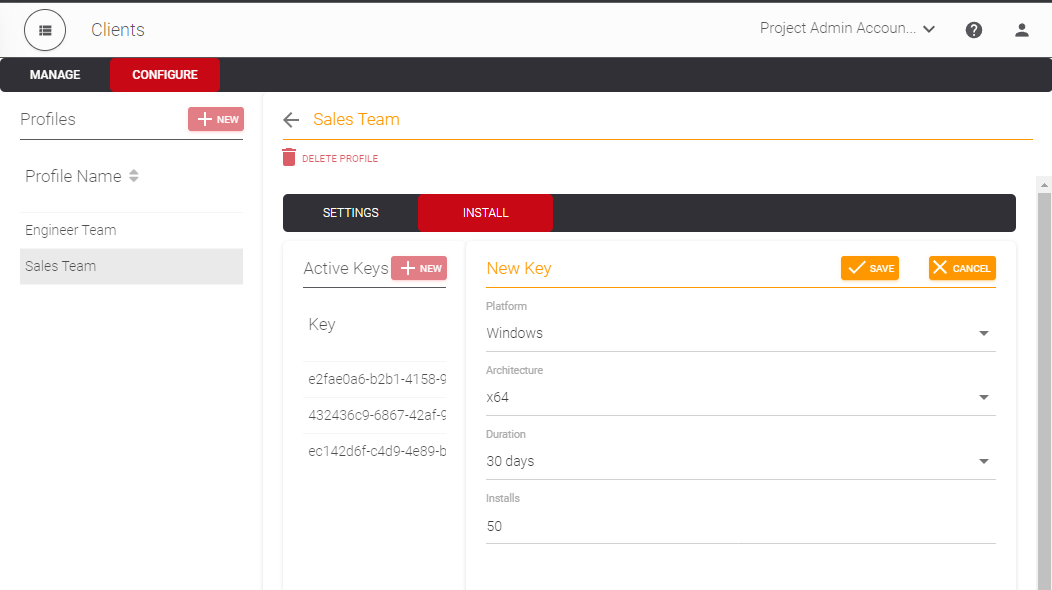
Editing an existing key
You can extend the duration or raise the install cap on a key at any time. Platform and architecture are fixed once a key is created; generate a new key to change them. Expired keys do not affect already-registered devices, keys are only consumed during the initial self-registration handshake.
Step 3: Deploy to devices
Installs are silent by default. There are no prompts during install, and no tray icons or other on-device indicators once the agent is running.
Windows
ScoutDNS generates an .msi file for Windows 10 and 11. Two common deployment paths:
- Group Policy / MDM: Upload the
.msito a network share and assign it via GPO (or push via Intune / your MDM). No command-line options, install keys, or tags are required, everything is baked into the file. - Manual install: Copy the
.msivia network share or USB. Install as a local administrator so standard users can’t stop or remove the service.
Some admins prefer to hide the agent from Add/Remove Programs to avoid accidental uninstalls.
[!WARNING] Installing with an expired key will still install the agent, but it can’t register. The client will use the network’s default resolvers and keep retrying until the key is reactivated or replaced.
macOS
ScoutDNS generates a .pkg file. Install on the target Mac with admin rights, or deploy through your MDM (Jamf, Intune for macOS, Kandji, etc.). Like Windows, no extra arguments, the install key is embedded.
Manage installed clients
Once installed, clients check in with ScoutDNS to register against the profile and start appearing in the Manage Clients view.
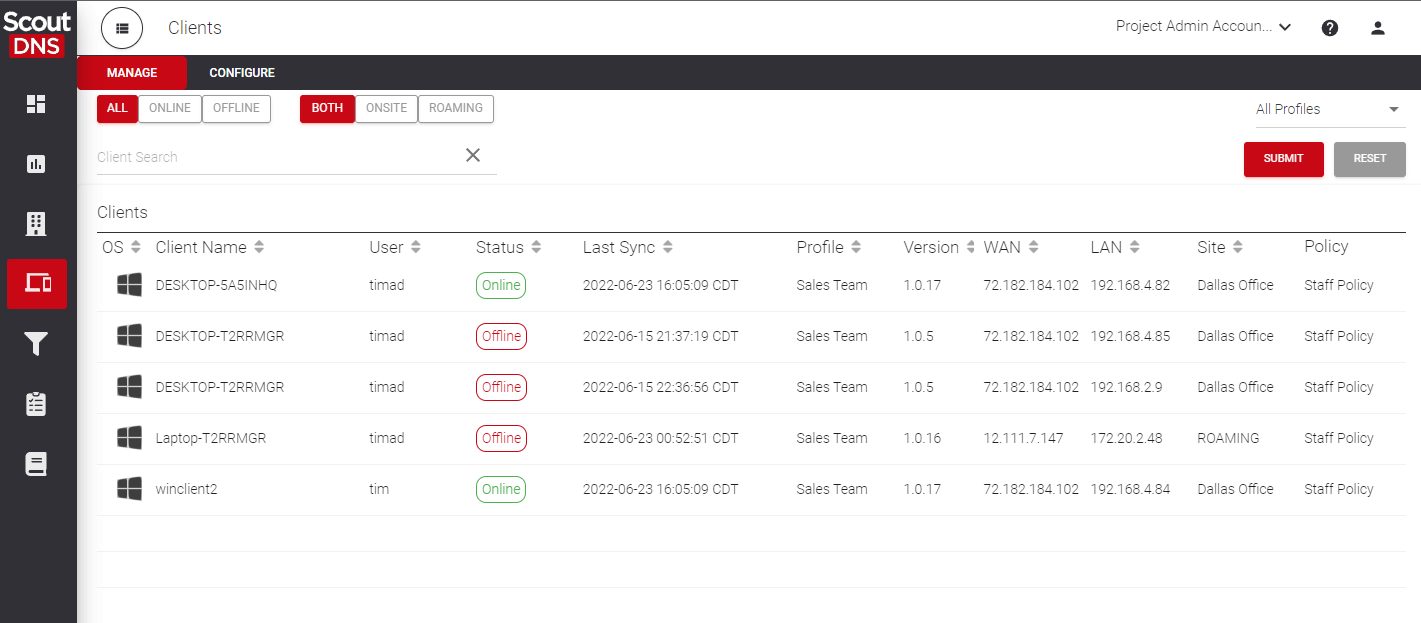
The Manage tab
Stat cards summarize the fleet, and filter chips narrow the table by Status (with fleet counts), Location (Onsite / Roaming), and OS; the search box matches device names. Columns shown:
| Column | What it shows |
|---|---|
| Device | OS icon and hostname, with the last known LAN IP underneath |
| Status | Latest reported status |
| User | Most recently signed-in user, with the AD domain underneath |
| Policy | Most recent policy applied, with its source underneath |
| Profile | Assigned profile |
| Site | Last known site (or Roaming), with the WAN IP underneath |
| Last seen | When the agent last checked in |
| Version | Current device agent version |
Click a column header to sort; the fleet loads 100 devices at a time with the exact matching total in the footer. See Clients Overview for the full page tour.
Client status states
| Status | Meaning |
|---|---|
| Online | Agent online, DNS filtered and encrypted |
| Offline | Agent offline, heartbeat not detected (normal for a device that is shut down or asleep) |
| Disabled | Agent has set DNS back to the network default and unbound from the loopback adapter |
| Uninstall | Uninstall queued; the agent runs its uninstall script on next check-in |
| Missing | The agent stopped reporting unexpectedly; worth investigating |
The device drawer
Click a device to open its detail drawer: a collapsible Dashboard (threat hits and an allowed/blocked chart over 1h to 30d), an Info tab with the device and network facts, and a Sessions tab listing recent sign-ins.
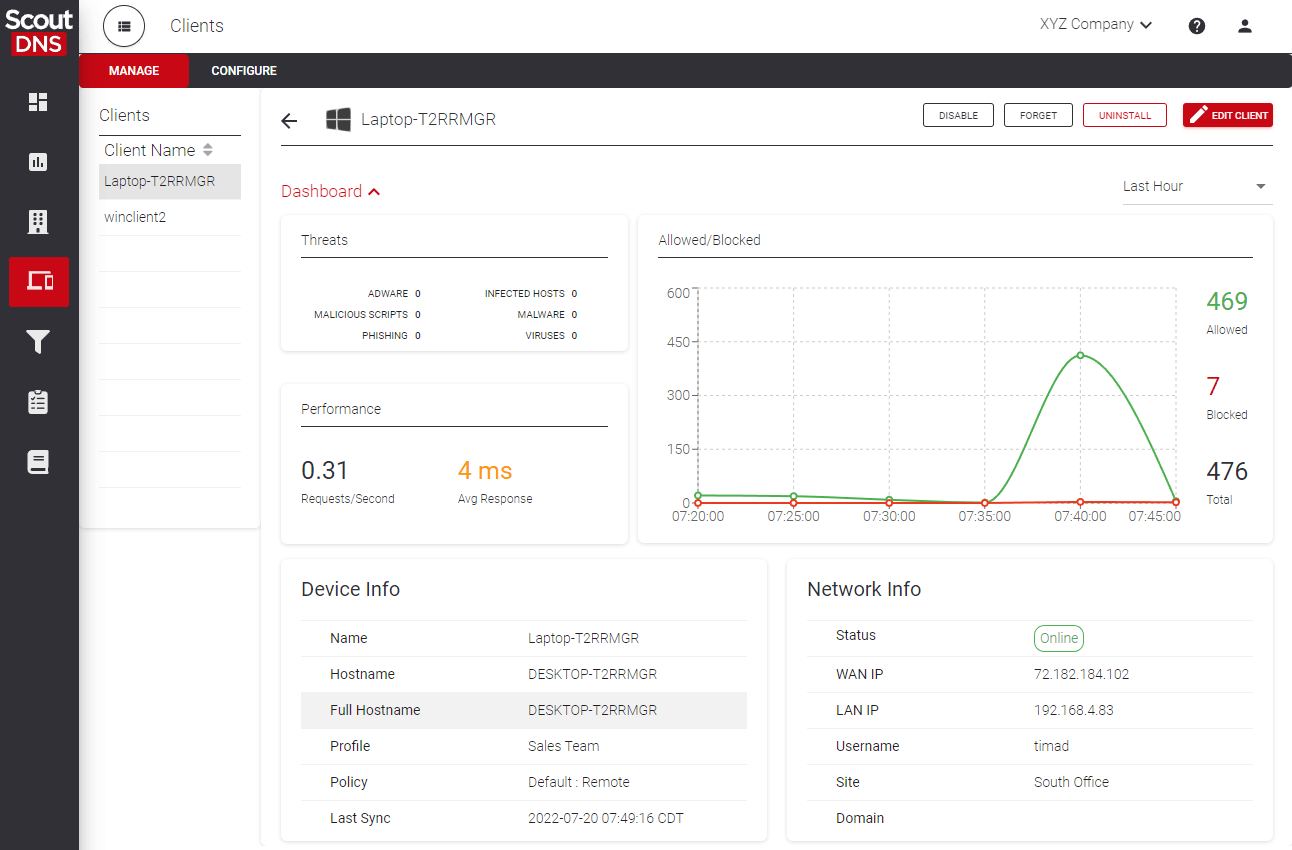
Device Info: Name (custom display name, doesn’t change the OS hostname), Hostname and Full Hostname (FQDN if domain-joined), Profile, Policy (shown as source : name), Last Sync, and Version. Network Info: Status, WAN IP, LAN IP, Username, Site, and Domain. Edit Client changes the display name, profile, or a device-level policy override.
Remote actions
The drawer’s action banner (and Multi-Select on the list for bulk operations) offers:
| Action | Effect | License/seat impact |
|---|---|---|
| Disable | Agent unbinds and restores network default DNS. Agent stays installed and waits for re-enable. | Does not release the seat |
| Enable | Resumes filtering, and also cancels a pending uninstall. | N/A |
| Forget | Removes the client from the console. If the agent is still running, it reappears on next sync. | Releases the seat |
| Uninstall | Queues an uninstall command; the agent removes itself on next check-in. Can only be canceled before the client picks up the command. | Releases the seat |
[!IMPORTANT] After Uninstall executes, the device can only rejoin by reinstalling the agent. Use Disable instead if you want a temporary pause.
If a forgotten client tries to rejoin after all seats are consumed, it stays unlicensed and inactive until a seat becomes available.
Client log data
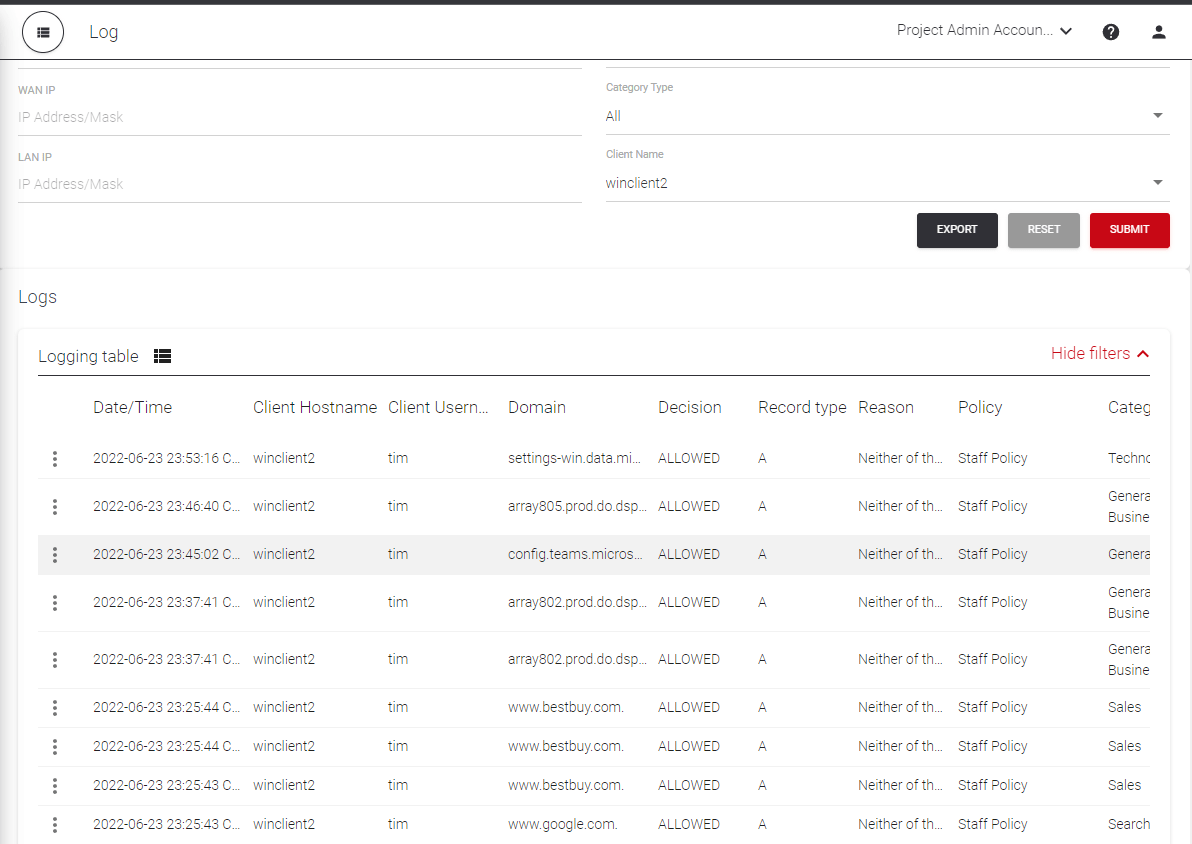
With the agent deployed, additional fields light up in the Query Log: the Client column shows which device made each query, and User attributes it to the signed-in user (current Windows agent required for per-user attribution).
- Filter to a specific device with the Clients filter, or to a person with Users.
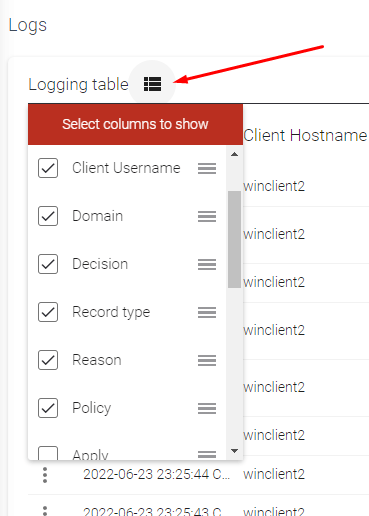
- Use the Columns picker to choose which of the twelve fields display.
- Export CSV downloads the current filtered view.
Related
- Working with policies, assigning policies to profiles and individual devices
- Active Directory policies, per-AD-group policy via Personas (used when Enable User Policies is on)
- Custom block pages, block-page templates assigned per profile
- Browser HTTPS certificate errors, installing the ScoutDNS root cert for clean block-page rendering on HTTPS sites