Browse Integrations & SSO
- Application categories (Zero Trust app management)
- Active Directory group policies
- Content categories
- Custom block pages
- Don't mix DNS providers
- Prevent DNS bypass
- Safe Search explained
- Safe Search supported search engines
- Security categories
- Working with policies
- Working with allow and block lists
- YouTube Restricted Mode explained
Entra ID group policies
Apply ScoutDNS policy by Microsoft Entra ID (formerly Azure AD) group membership. Uses a read-only Enterprise App connection, no agent-side AD discovery needed.
ScoutDNS can enforce policy by Microsoft Entra ID group membership so the policy follows the user across devices. This article covers Entra ID; for on-prem Active Directory see Active Directory group policies.
How Entra ID sync works
ScoutDNS connects to your Entra ID tenant via an Enterprise Application with read-only Microsoft Graph permissions. Once authorized, the ScoutDNS policy engine matches users from roaming clients to Entra users and groups, and applies the policy you’ve configured in the Persona.
[!NOTE] ScoutDNS only requests the minimum read-only permissions needed to discover users and groups. It does not gain access to emails, messages, calendar data, or any other resource. You can revoke the consent at any time from the Entra admin console.
Users not in any mapped group fall back to the Device Profile default policy.
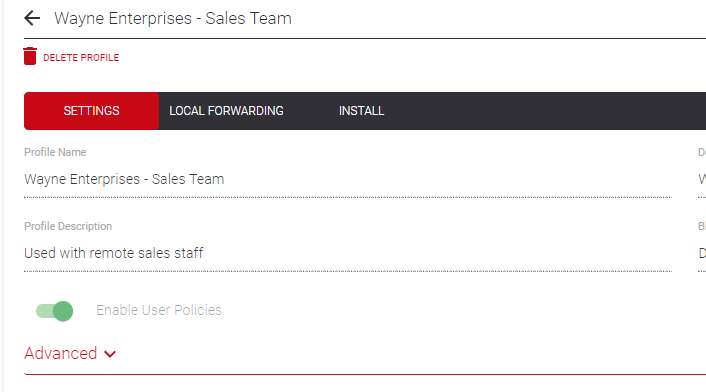
Step 1: Enable user policies on device profiles
Entra ID group policy layers on top of device profiles. The profile sets the fallback; Entra groups override it for matching users.
- Open the relevant Device Profile.
- Toggle Enable User Policies on.
- Save.
If you haven’t deployed roaming clients yet, start there.
[!IMPORTANT] The profile’s default policy is the fallback for users who don’t match any Entra group in the Persona. Choose carefully, unmapped users get this.
Step 2: Create a Persona
- Users → Configure → New Persona.
- Name the Persona on the Settings tab.
- Open the Entra ID subtab.

Add and bind a tenant
- Click Add Tenant and approve the read-only Enterprise App consent.
- Once consent is granted, the tenant appears in the dropdown.
- Select it and click Bind.
For multi-tenant accounts, the default tenant binds as the Primary Tenant.
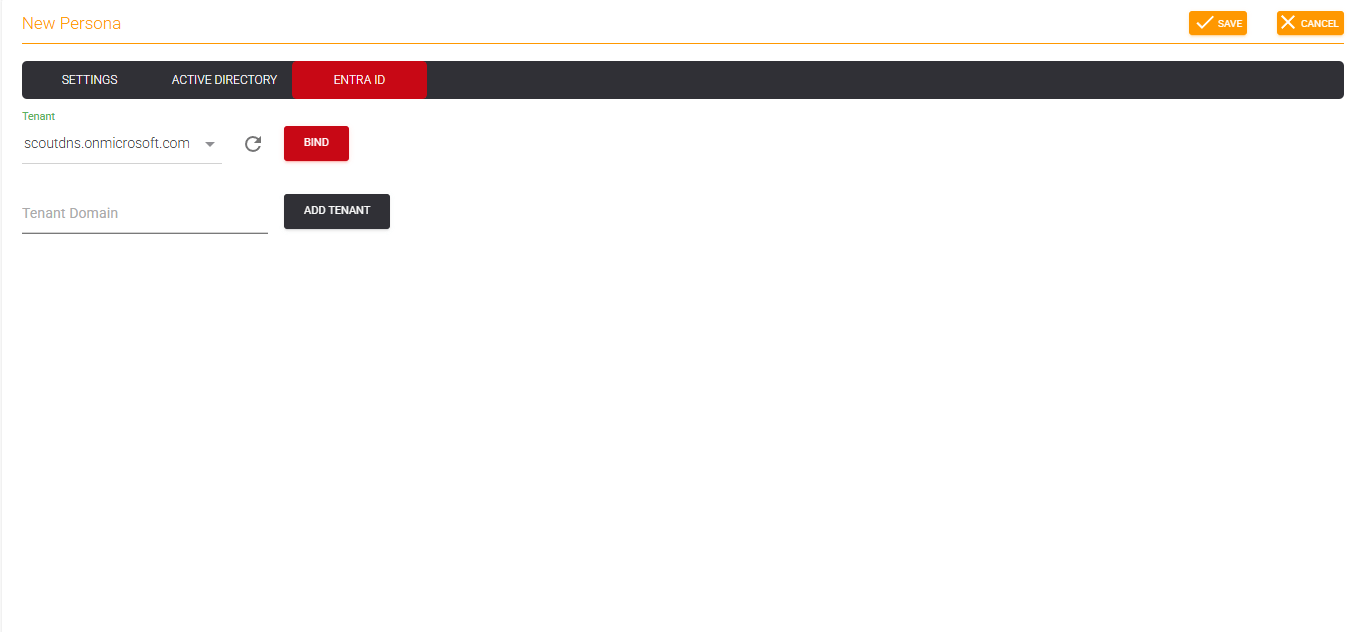
[!NOTE] A tenant can only be bound to one Persona at a time. To reuse a tenant on a different Persona or account, you must Unbind it from the current Persona first.
Multi-tenant accounts (MSPs)
MSPs running multi-tenant Entra deployments can add additional tenants:
- Click Add Tenant.
- Enter the Microsoft tenant domain (ends in
onmicrosoft.com). - Click Add Tenant. The new tenant appears in the dropdown.
- Select and Bind to the appropriate Persona.
Map groups to policies and set priority
After the tenant binds, all Entra security groups become visible.
[!TIP] For large directories, the initial sync can take a few hours to complete. ScoutDNS performs regular background syncs to pick up new groups and users. You can also trigger a manual sync from the UI.
- Move groups from Observed Groups to Configured Groups.
- Assign a policy per group.
- Set a priority (1 = highest). Priority resolves multi-group conflicts when a user belongs to more than one mapped group.
- Save.
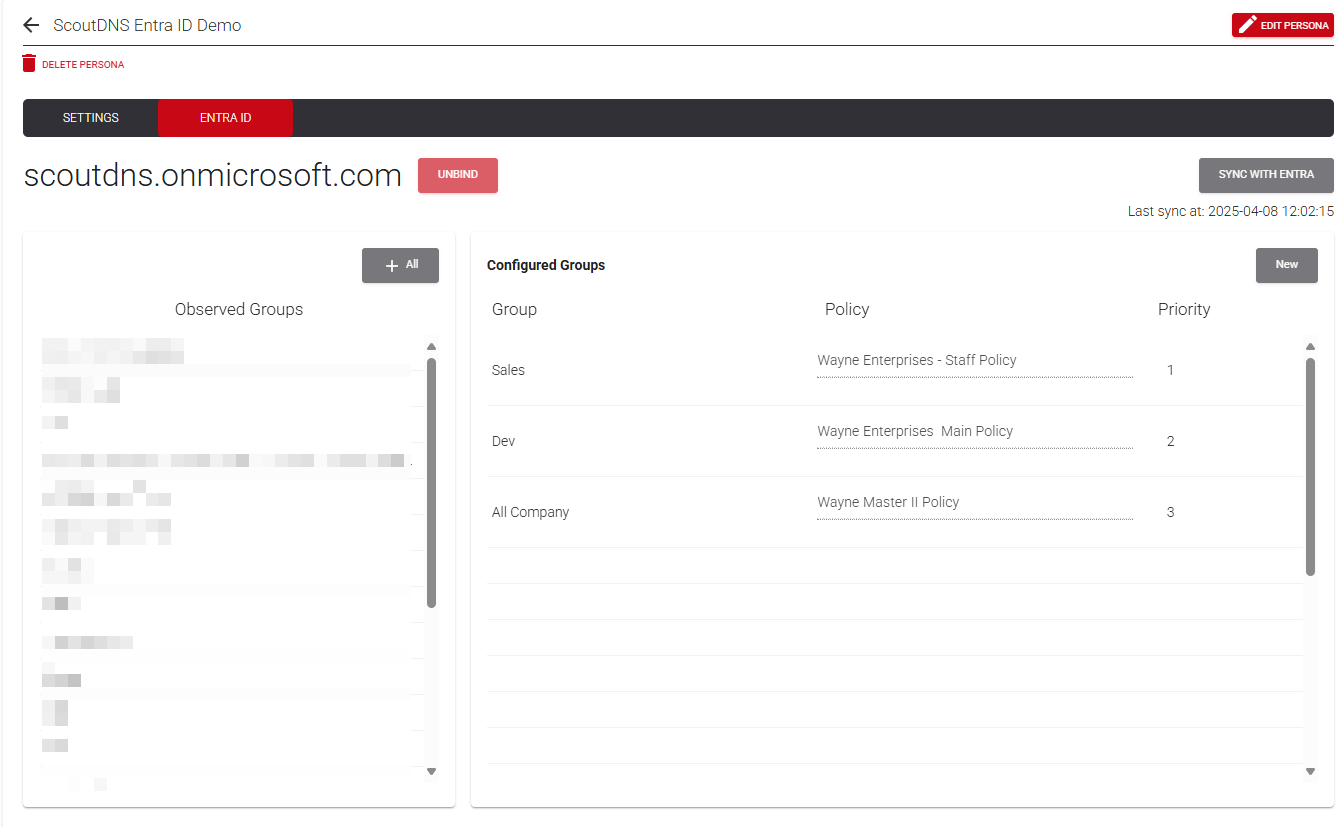
Any Entra security group can be selected for policy assignment.
Step 3 (MSP only): Link the Persona to an organization
If your account uses the Organizations tab, link the Persona to the right organization so the Users tab and reporting align, same pattern as linking Sites and Profiles.
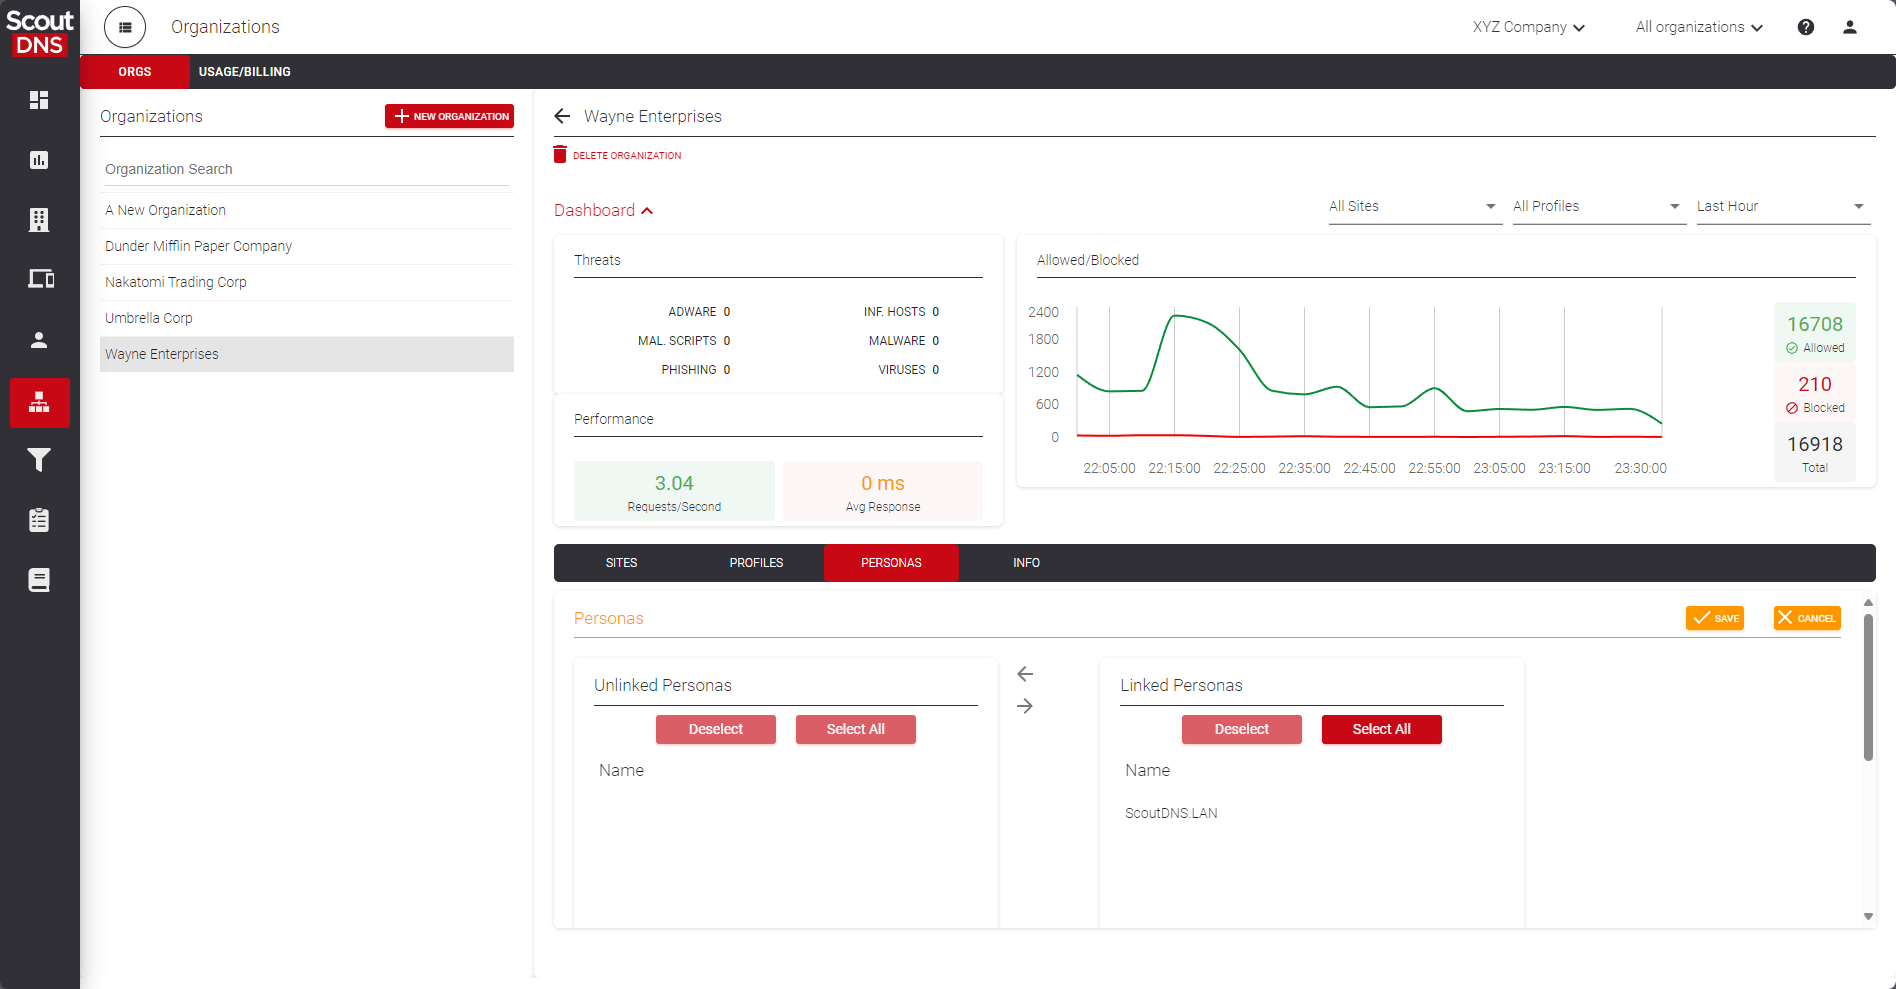
[!TIP] Create the Persona from inside the relevant Organization view to auto-link it.
Related
- Single sign-on (SSO) with Microsoft Entra ID, admin-console SSO (vs end-user policy enforcement)
- Active Directory group policies, the on-prem AD counterpart
- Roaming clients (device agents)
- Working with policies
- Organizations, multi-tenant configuration